73Custom
GuitarNoobie from HC
ok, first off, mark thanks for this forum and giving us HC refugees some place to hang out and feel some familiarity...
second, mark asked me if i could post this thread here at MWGL.... if you have already followed this at HC or MLP just go with it
anyway, let's get on with it...
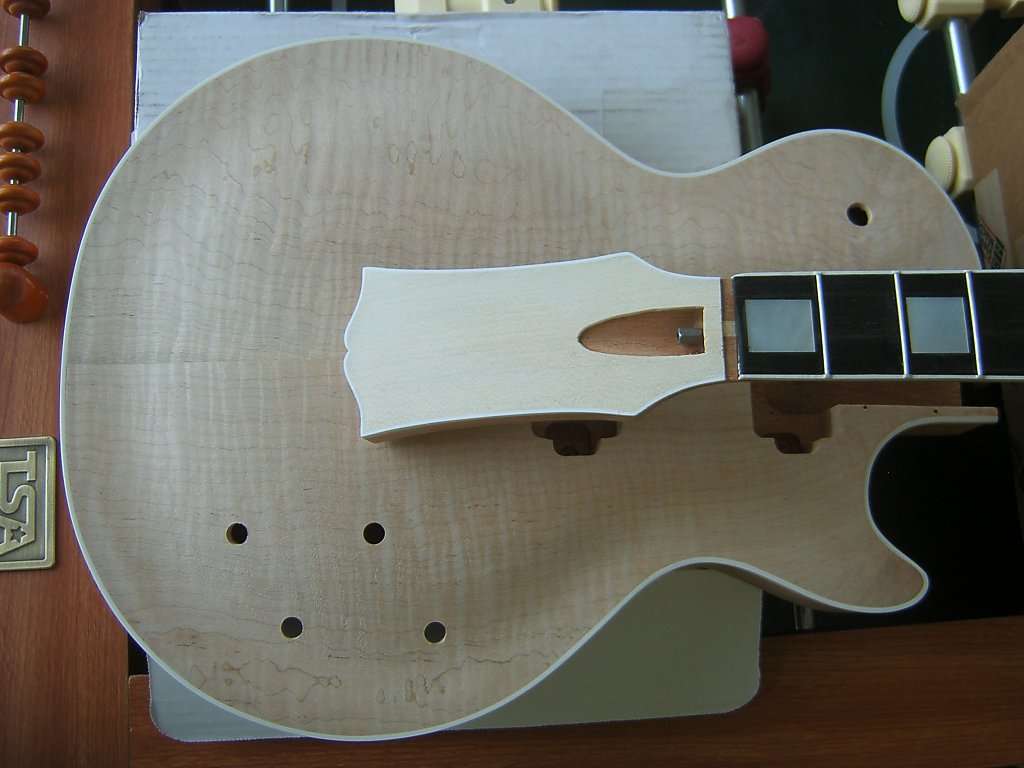
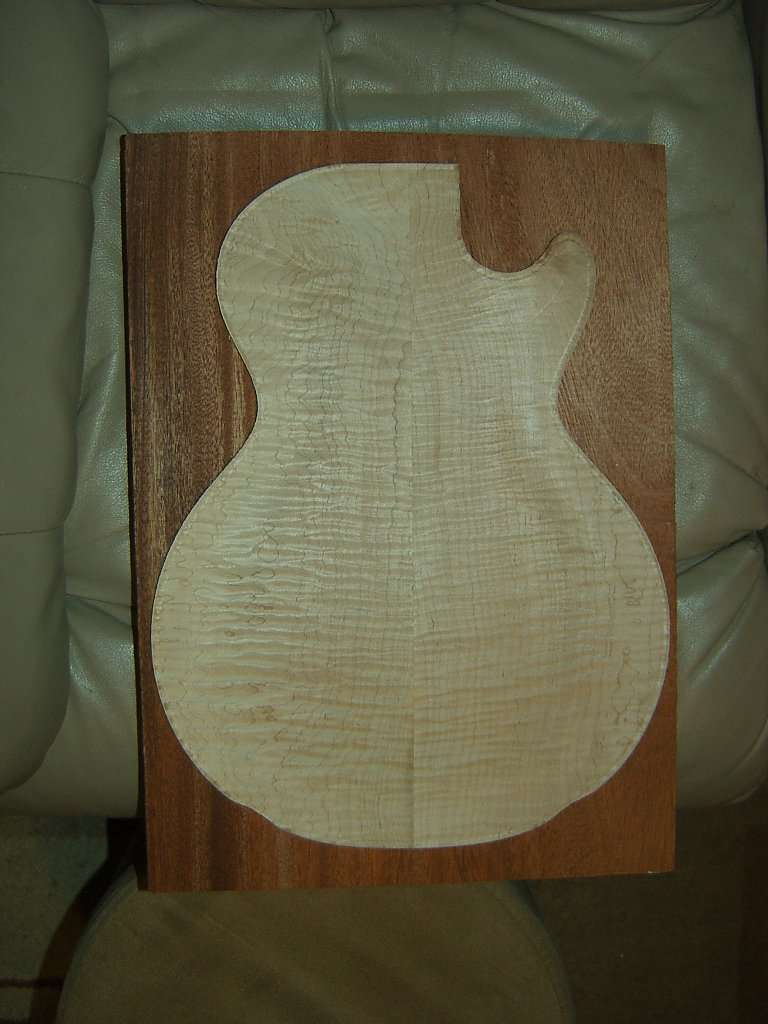
here's the carved top i bought for this build. if you would like to know how to carve you own top, check out the Cedar/Aspen Build link in my sig...
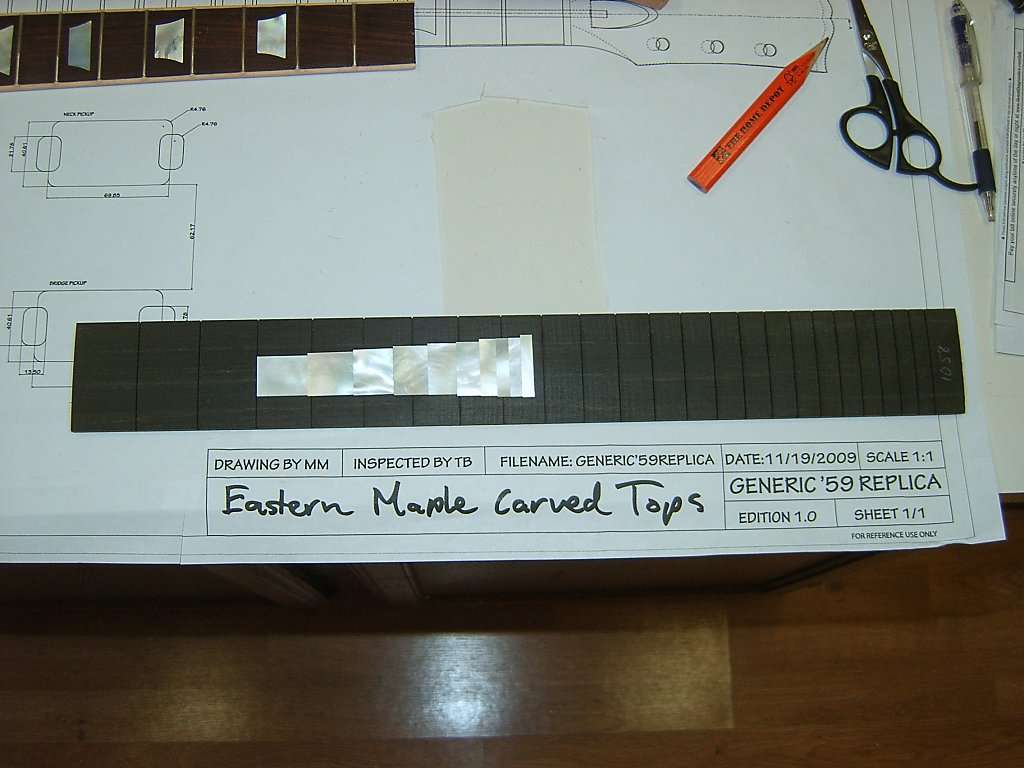
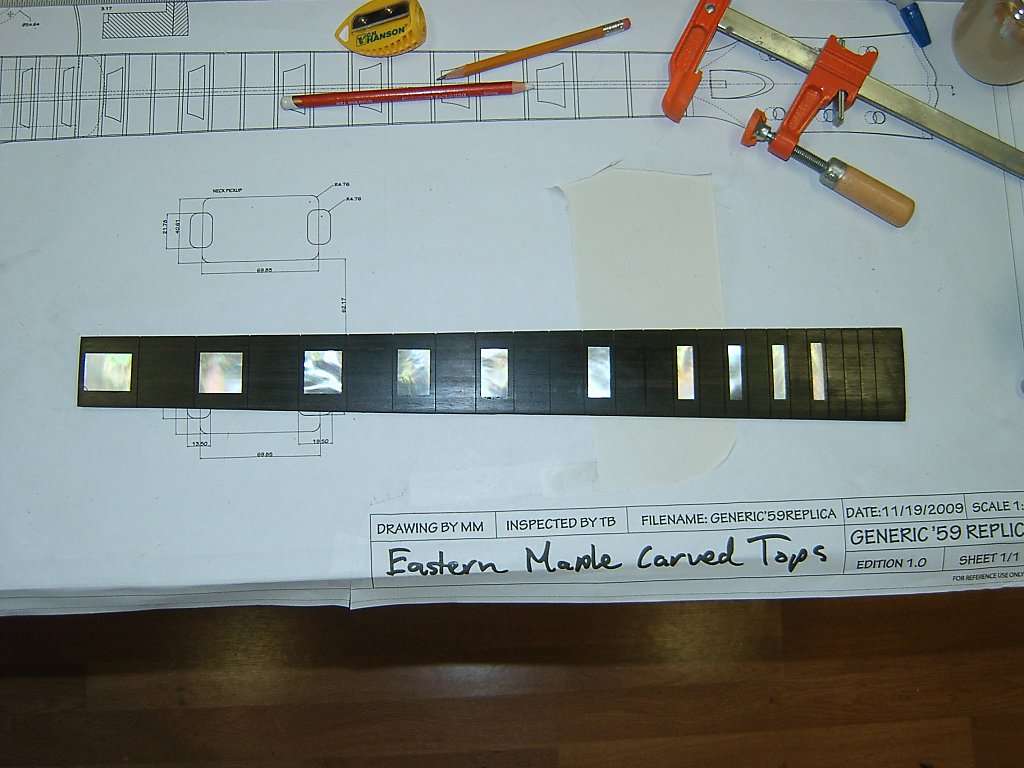
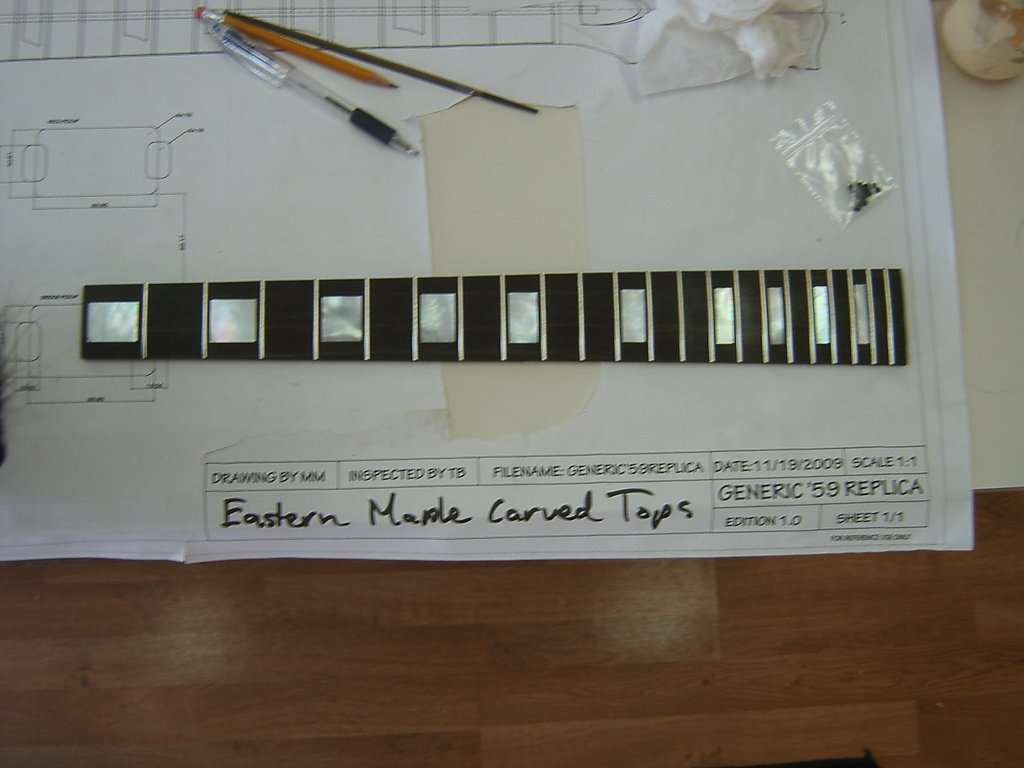
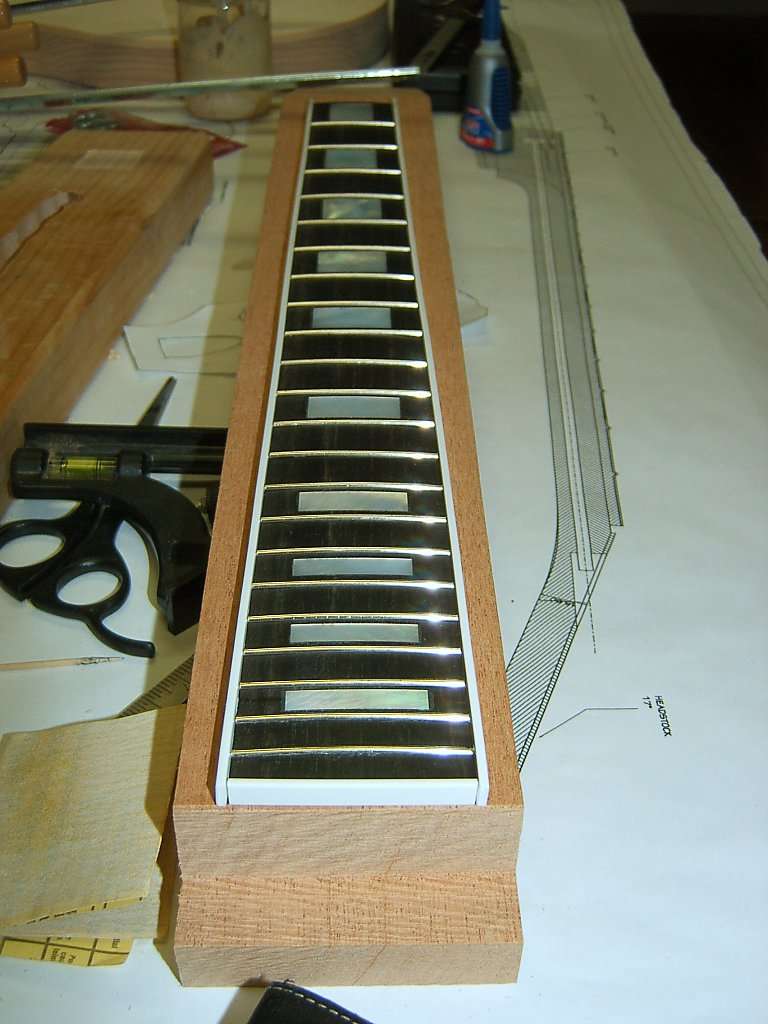
here's my stewmac ebony fretboard and mop inlays...
this is what i am thinking about doing with the colors...

The Plan:
Mahogany Body (one piece blank, purchased from HC member)
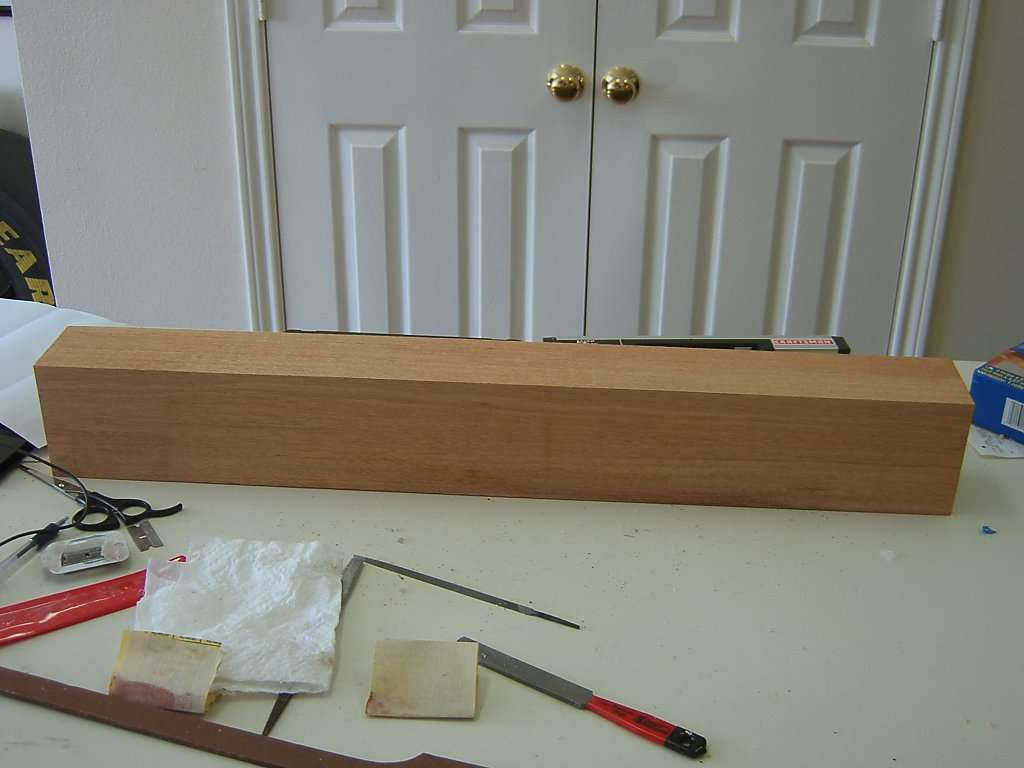
Mahogany Neck 24.75" (blank purchased from Grizzly)
Maple Top (pre-carved flame top purchased from Eastern Maple Carved Tops, Thanks Tom !!! )
)
Ebony Fretboard (Stewmac)
Custom Style Inlays (Stewmac)
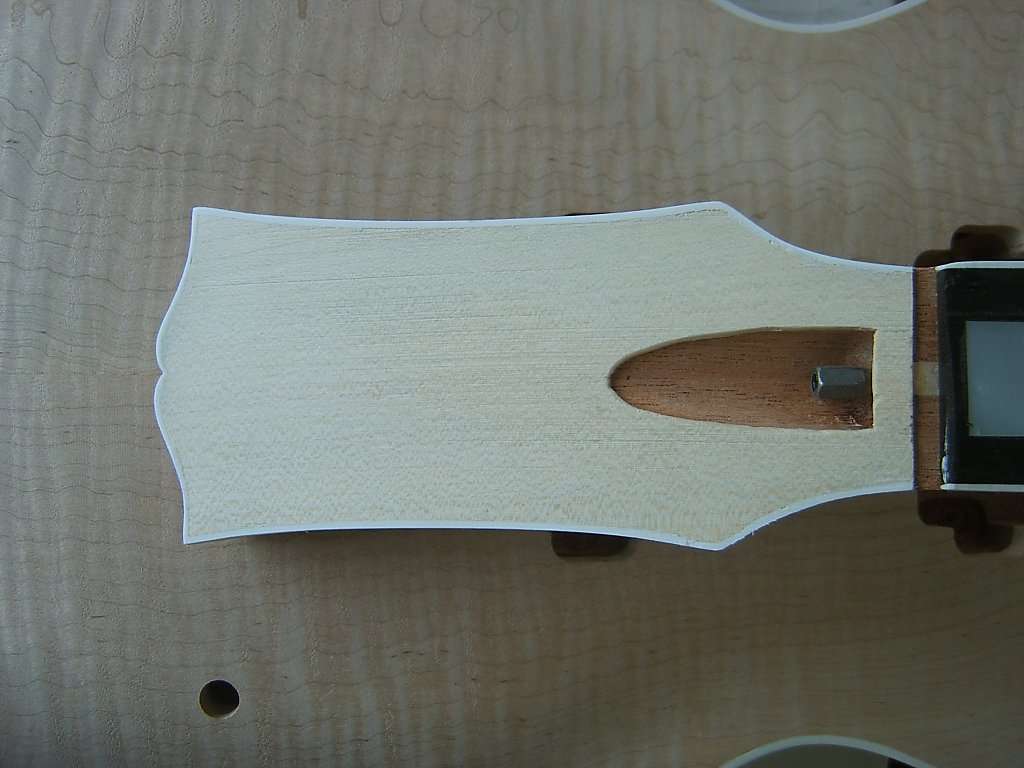
Holly Headstock Veneer (Eastern Maple Carved Tops)
Bone Nut
Not sure on hardware or pickups yet...

here's the neck blank from Grizzly... enough for two necks...
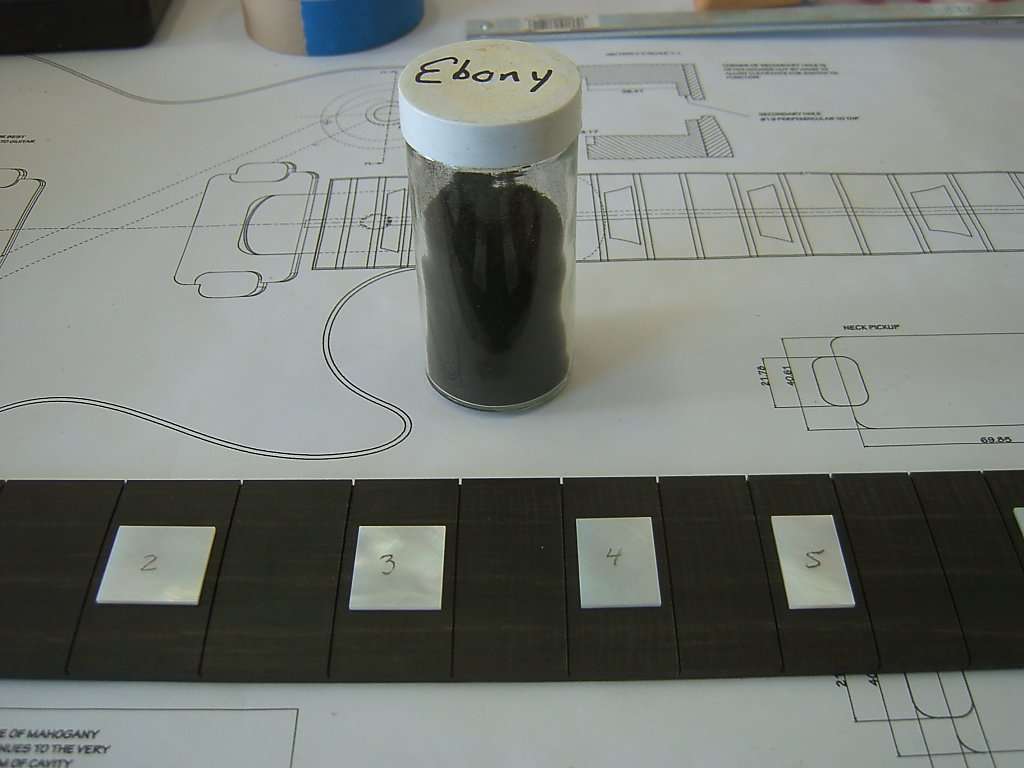
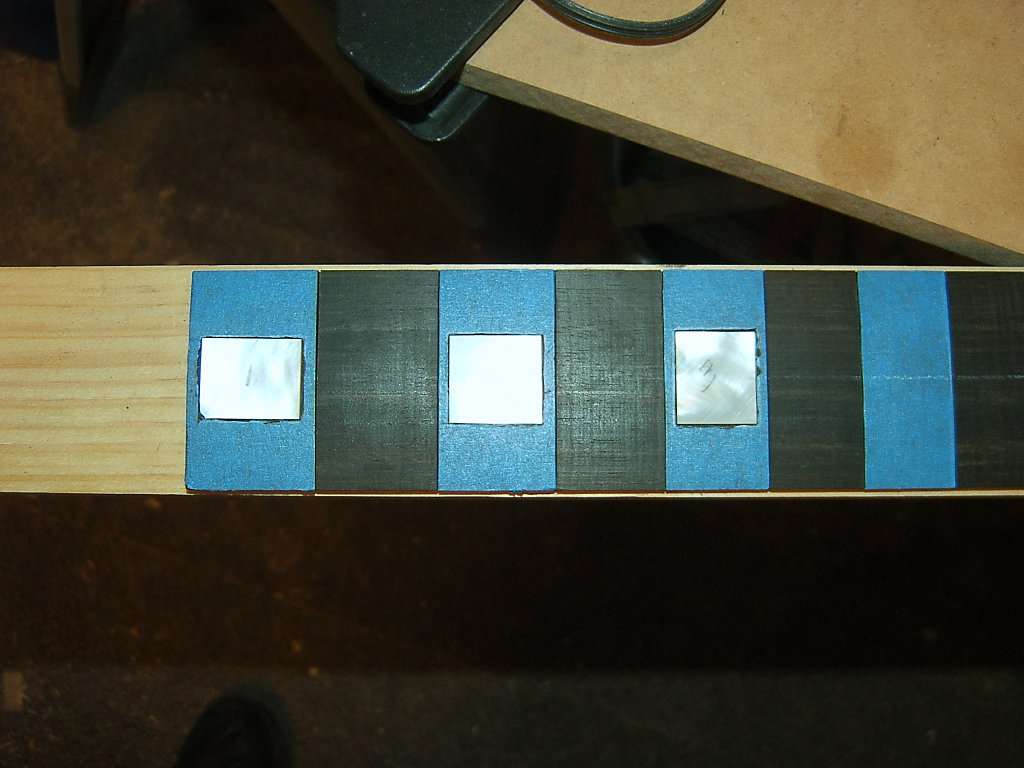
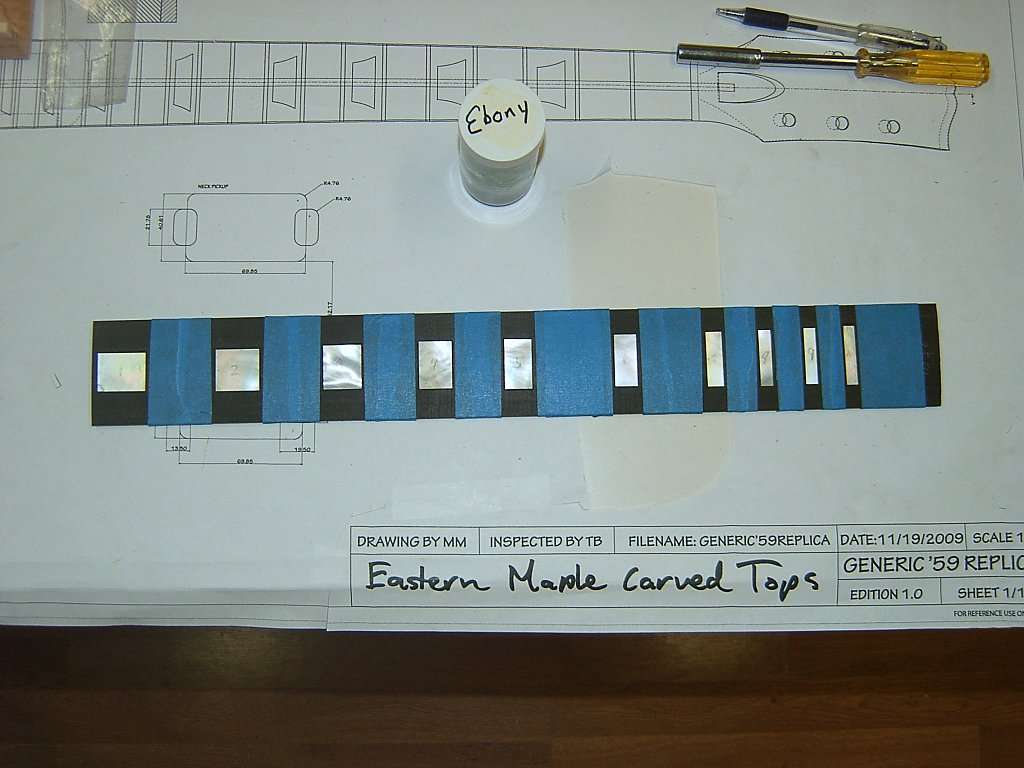
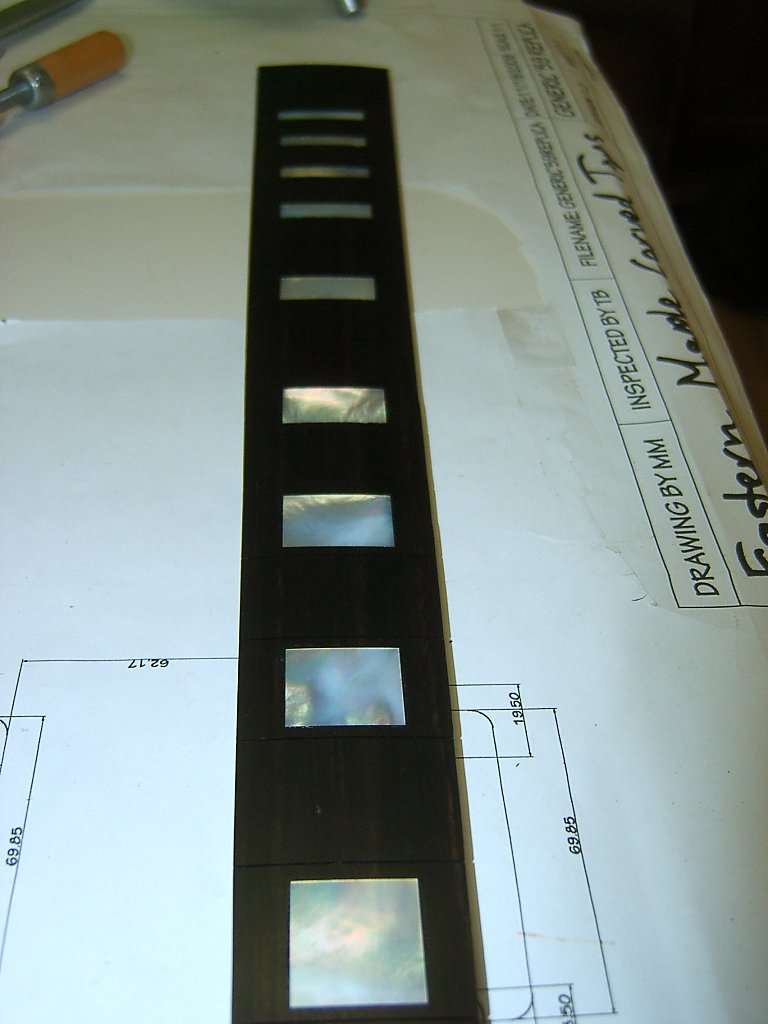
inlays numbered and laid out on the ebony board

shaved the back of the board down until it was about 3/16" thick. i collected the sawdust to use to make filler later.
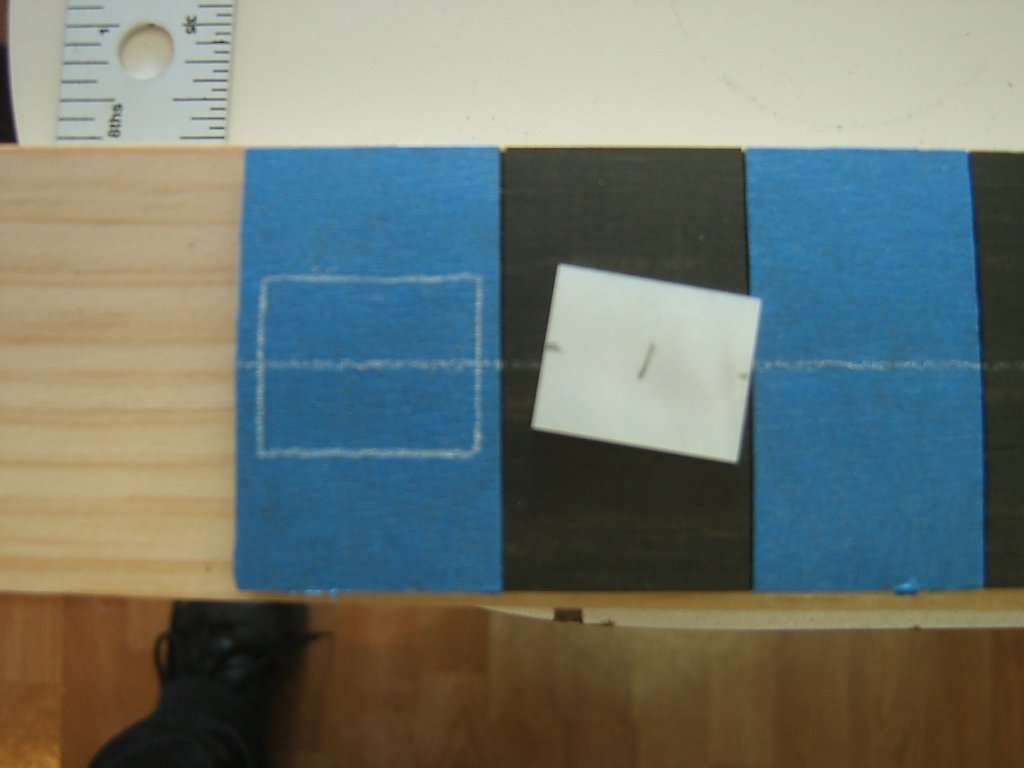
taped up and ready to go

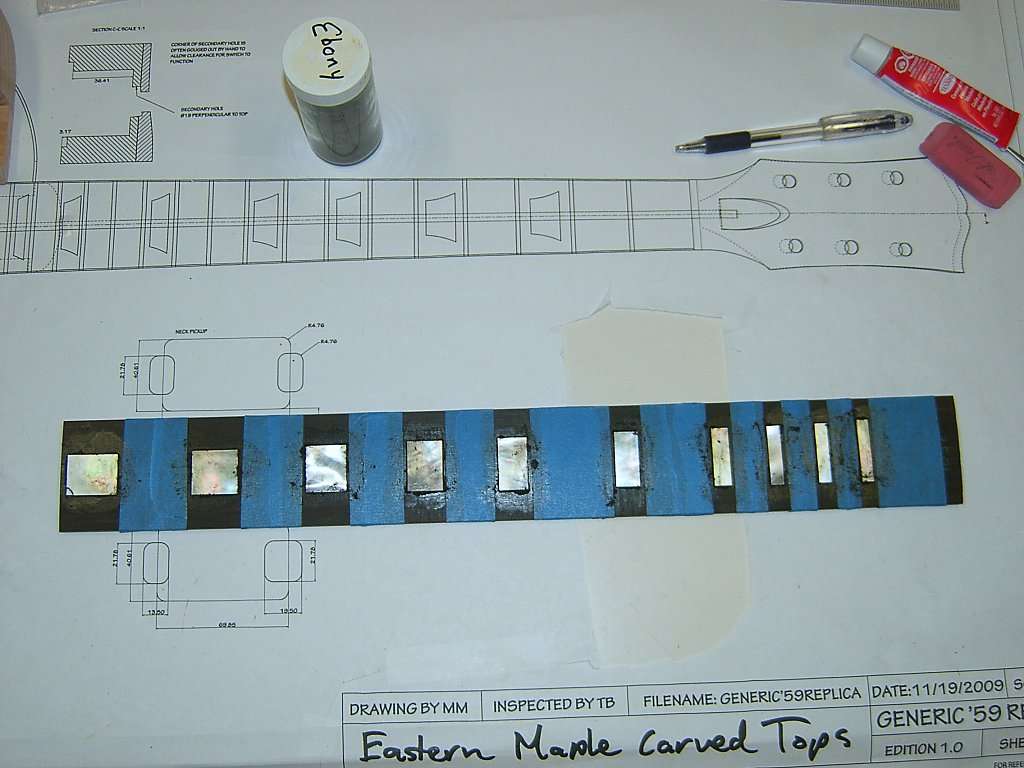
i centered the inlay and drew an outline of it.
next i used a razor blade to score the board and cut away the tape.
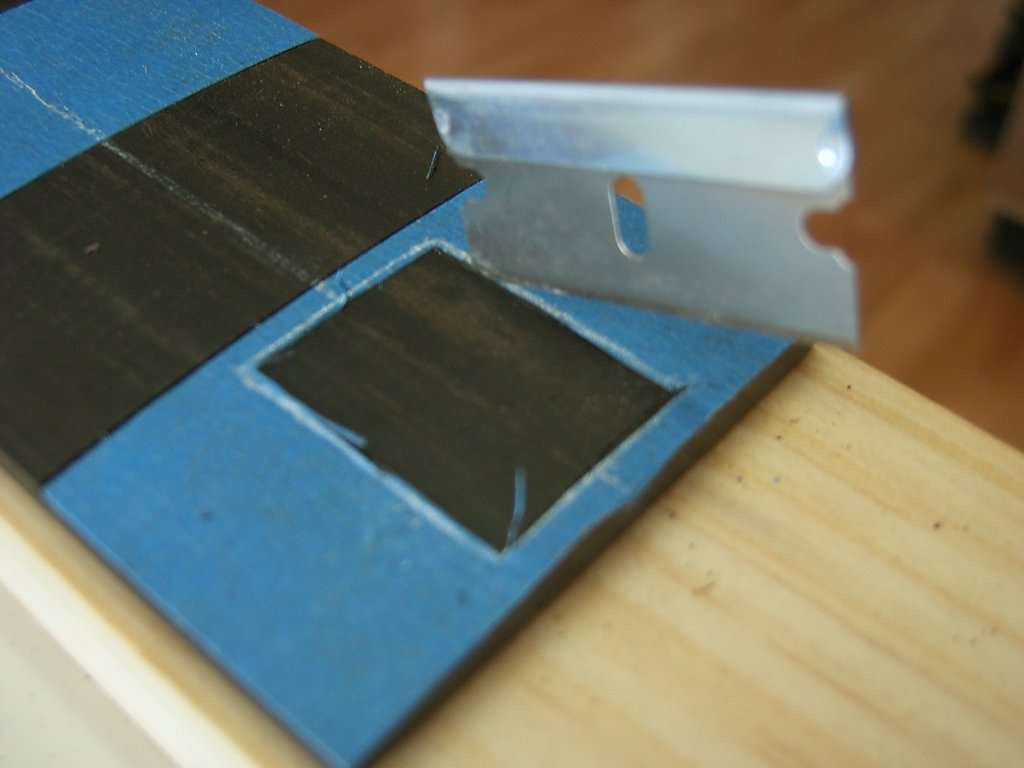
aligned a straight edge to help the dremel cut clean and straight...

1st inlay slot cut...

inlay work...
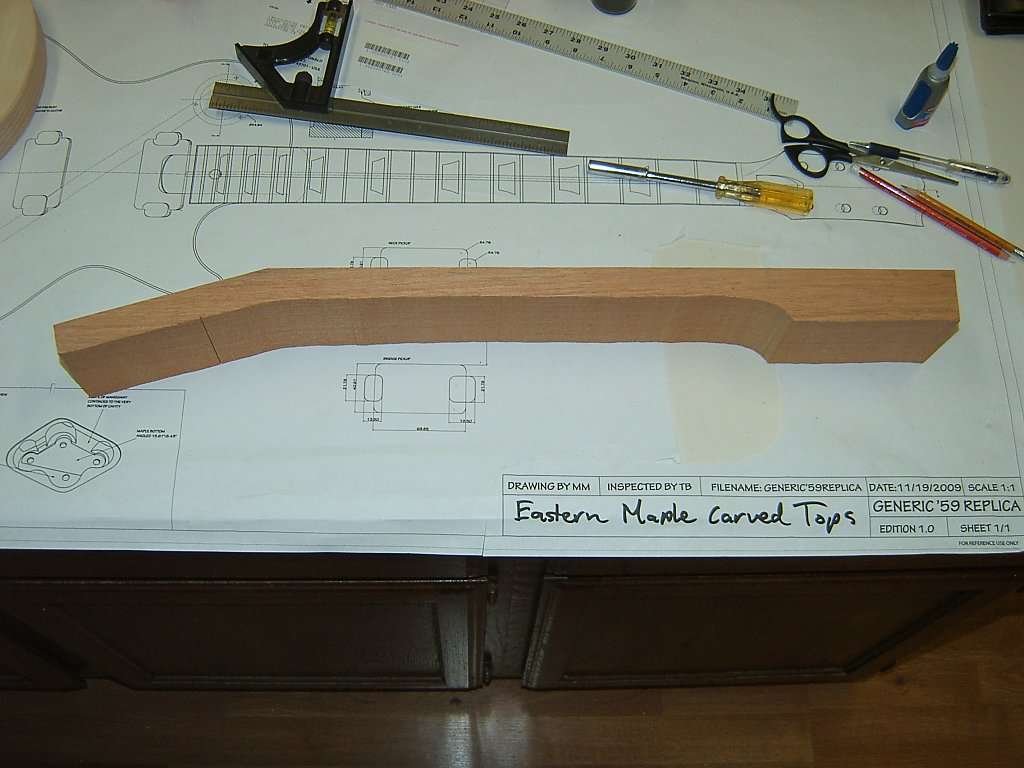
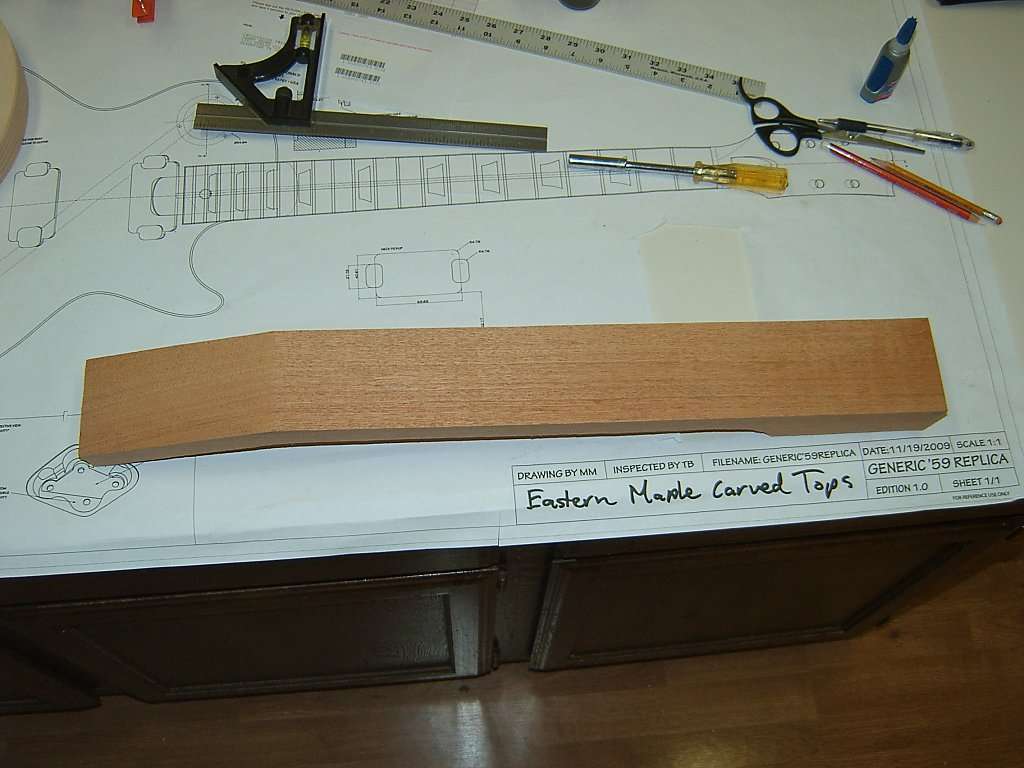
in the meantime, i did a very rough cut on the neck...
inlays cut, fret slots covered, ready for ebony filler...
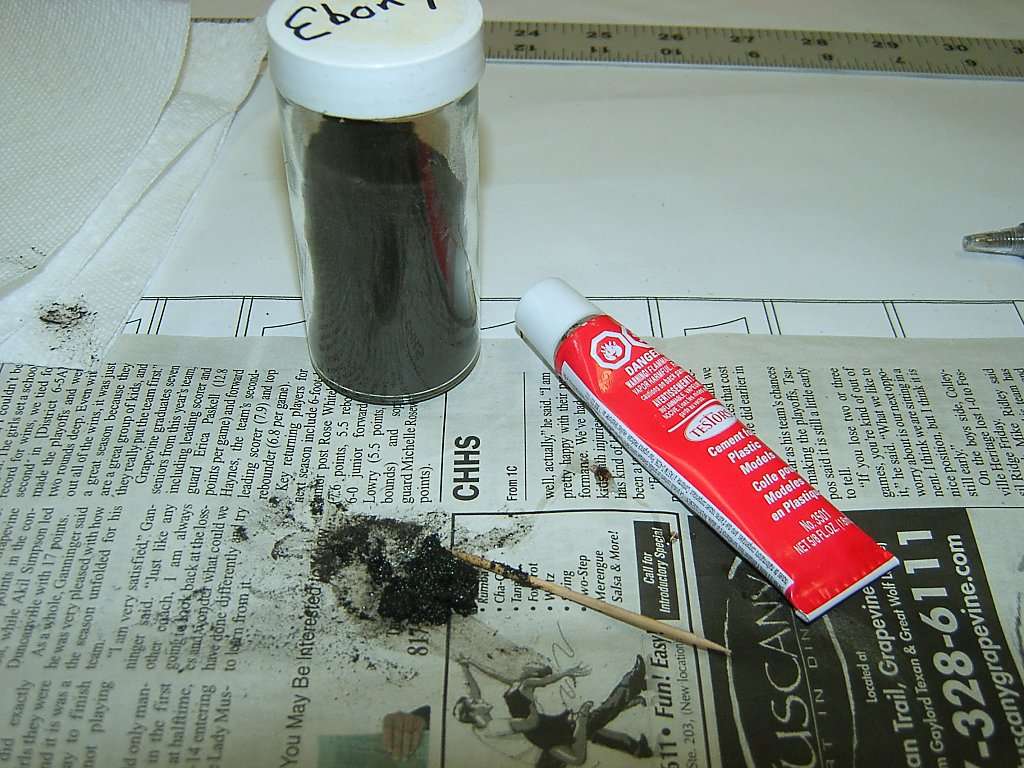
the magic goop: testers model cement and left over ebony sawdust...
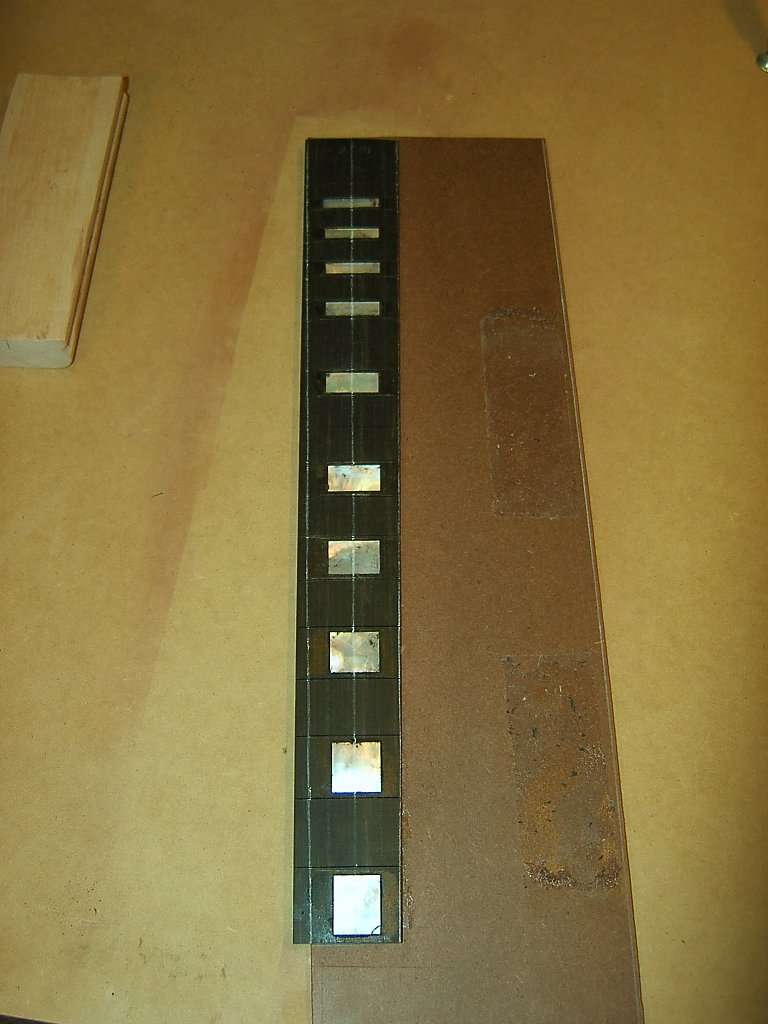
all the gaps filled and drying...
ready to trim to size and sand the filler and inlays down to the 12" radius...

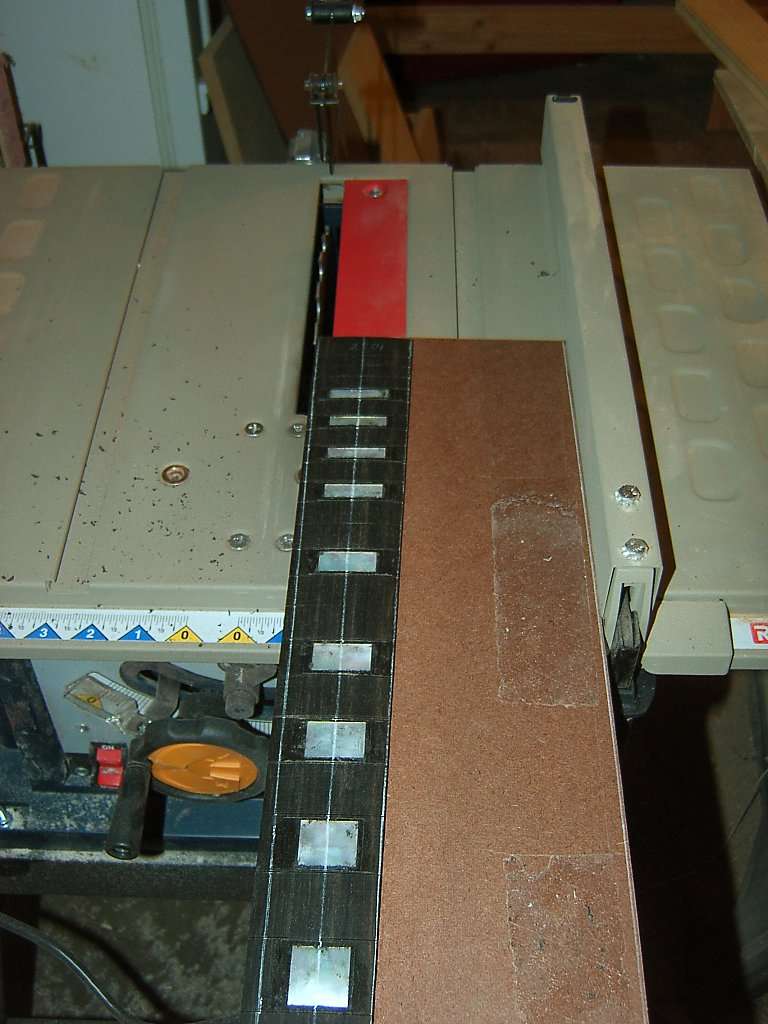
trimming the fretboard using my table saw. i use double sided rug carpet tape to hold the board in place.
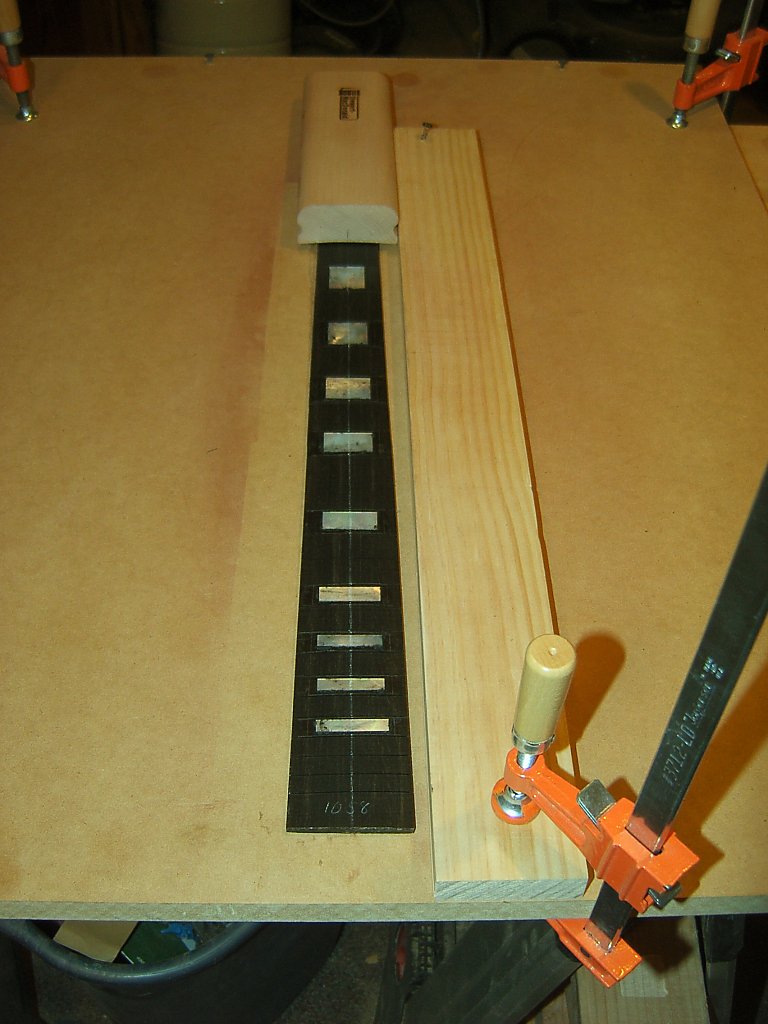
then i created a jig to keep the radius block on center while sanding the inlays down to meet the board. again, double sided rug carpet tape to hold the board in place.
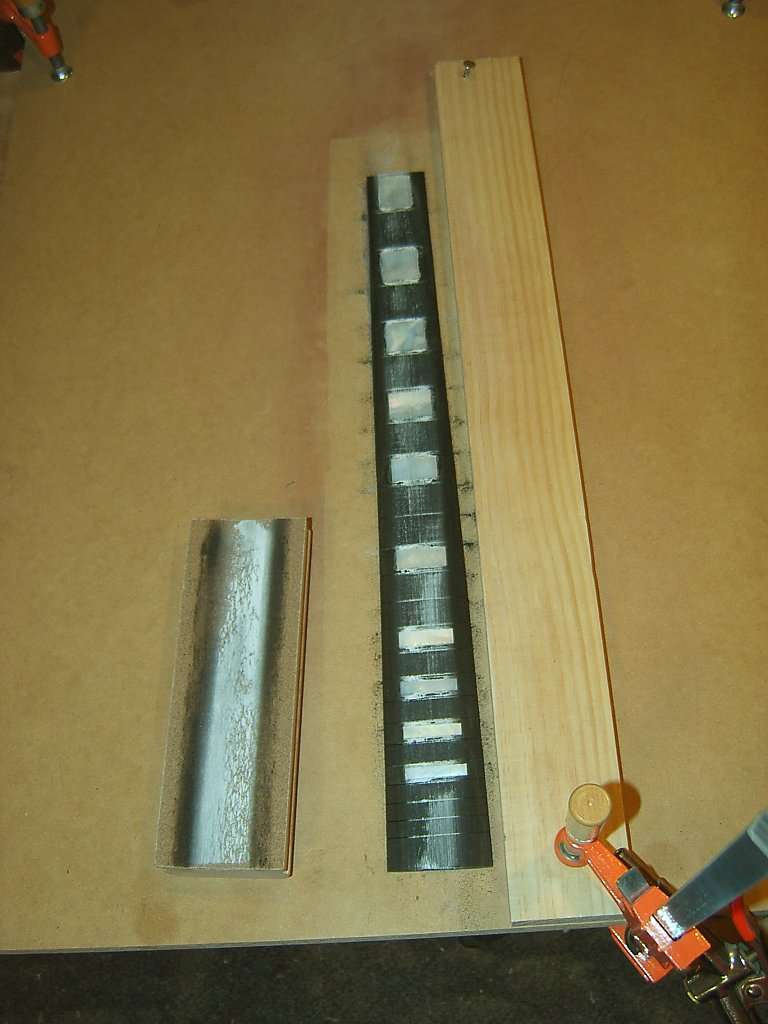
i went from 100 grit up to 800 grit. you can see at first it's a lot of inlay coming off. sand paper is held to the radius board with double sided carpet tape, deja vu... (just wait, all the templates for routing are held with the stuff too, lol)
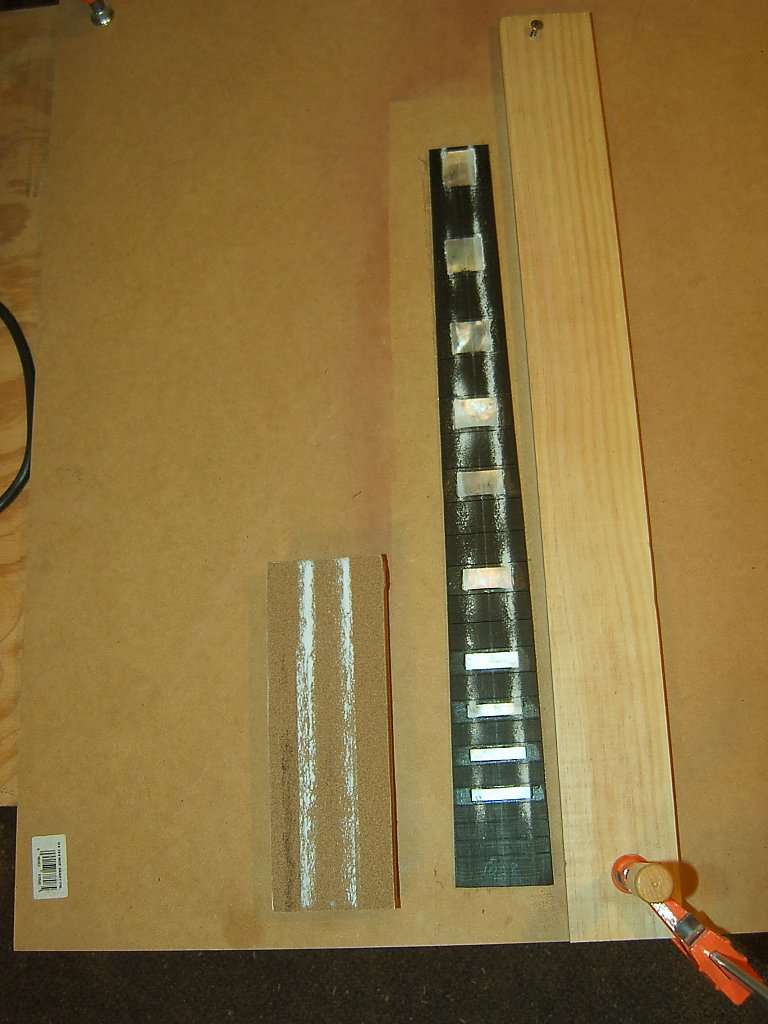
after a while with the 100 grit i start to get the inlays leveled down to the board... i have as much ebony coming off as MOP...
here's the trimmed and sanded ebony with a little lemon oil rubbed on it...
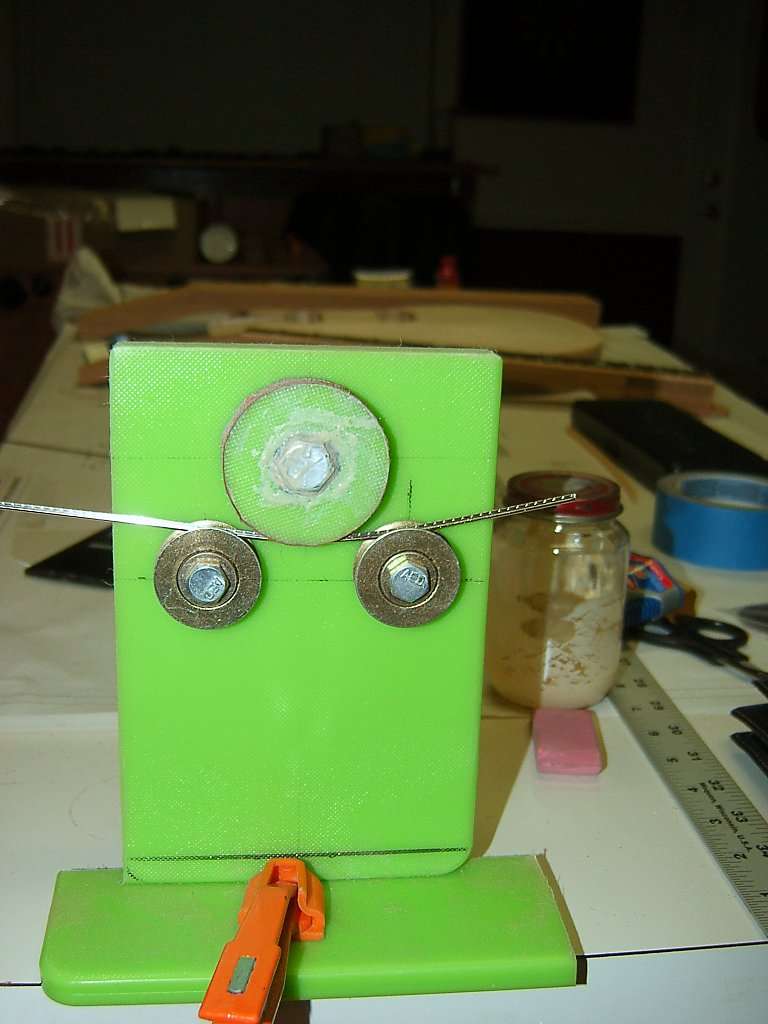
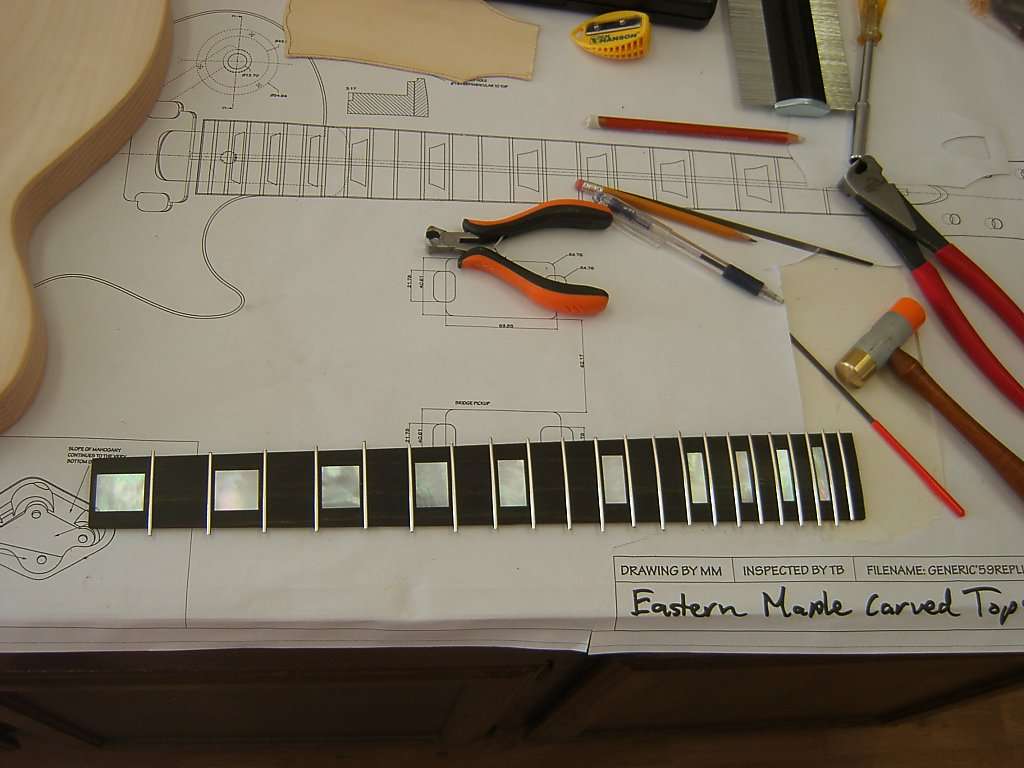
next i bent some fret wire to a 12" radius using my handy, dandy homemade fret bender...
finished fret wire...

btw, if you are interested in how to build the fret wire bender following this link. i wasn't gonna pay $100 from stewmac and an HC member pointed me to these plans... i used sander paper and double sided tape instead of the outdoor tread tape and the whole thing cost me about $18.....
Make Your Own Inexpensive Fret Bender
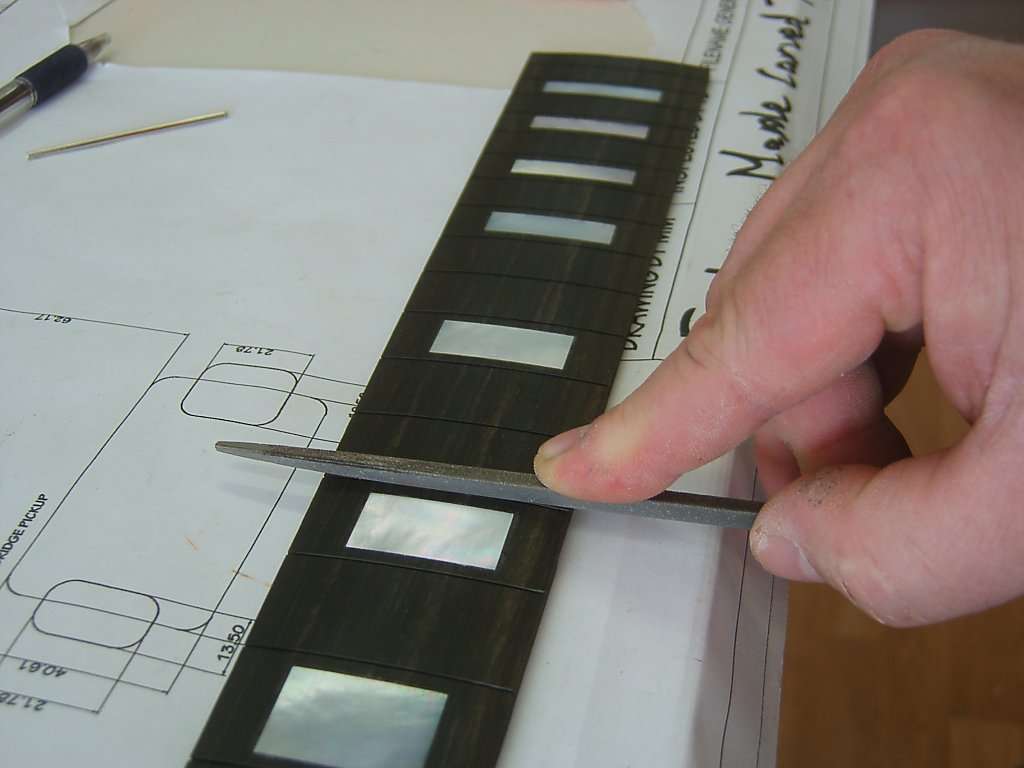
chamfering(beveling) the slots prior to fretting... just one or two drags of the file does it...
fretting has begun. use the fret cutters to cut the fret wire...

i use a fret hammer to seat the fret wire...

and then some fret pullers to remove the fret, add superglue and press back in place.
board is prepared for glue and the press...
i use gel superglue, much cleaner and less runs....
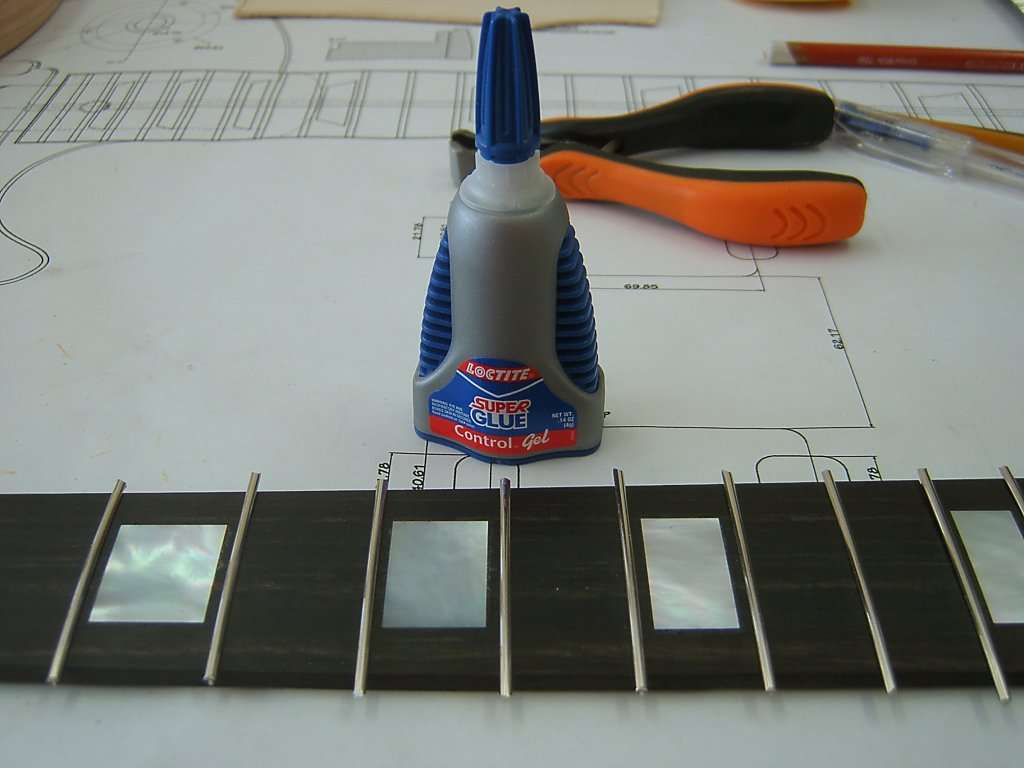
here is the three drops of gel superglue...

tapped back in with the hammer and then pressed...

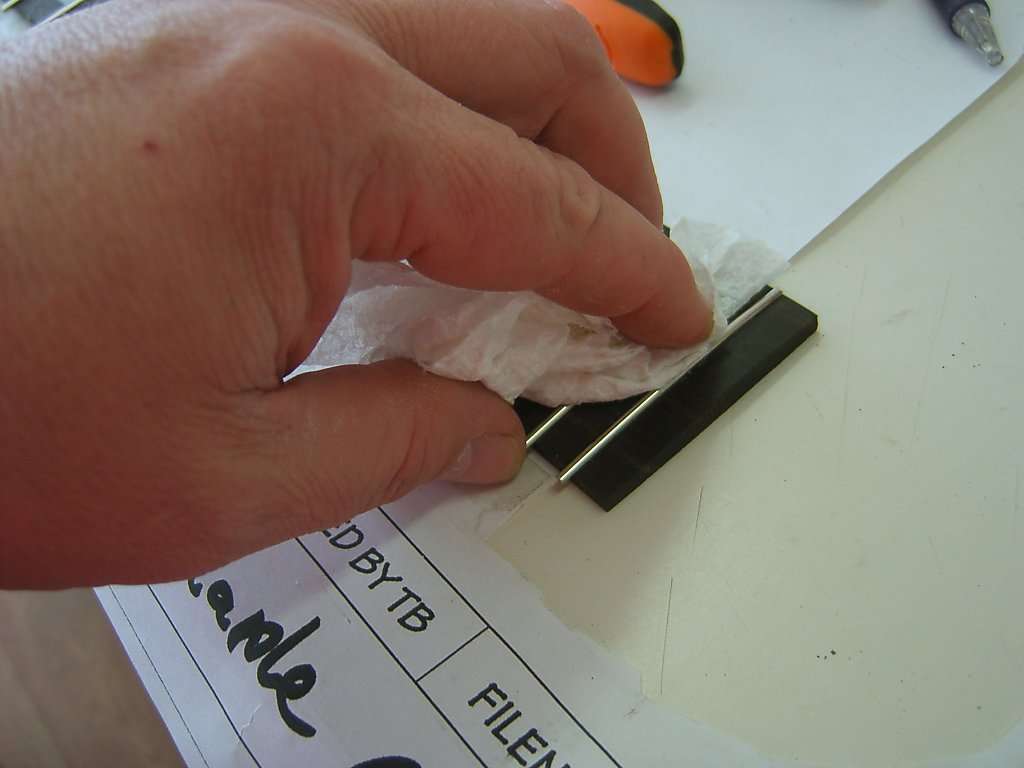
quickly wipe the glue off the fretboard before it dries...
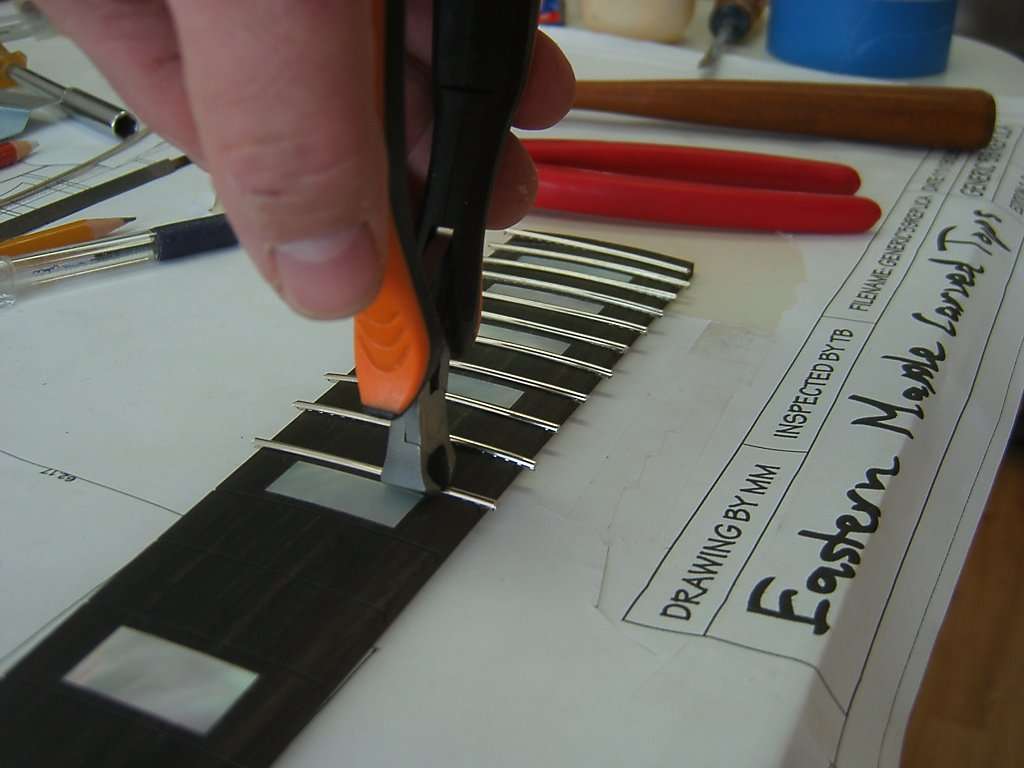
once they are all glued, reset and pressed, it's time to trim the edges.

finished

next up, glue on a white binding to the ebony board...
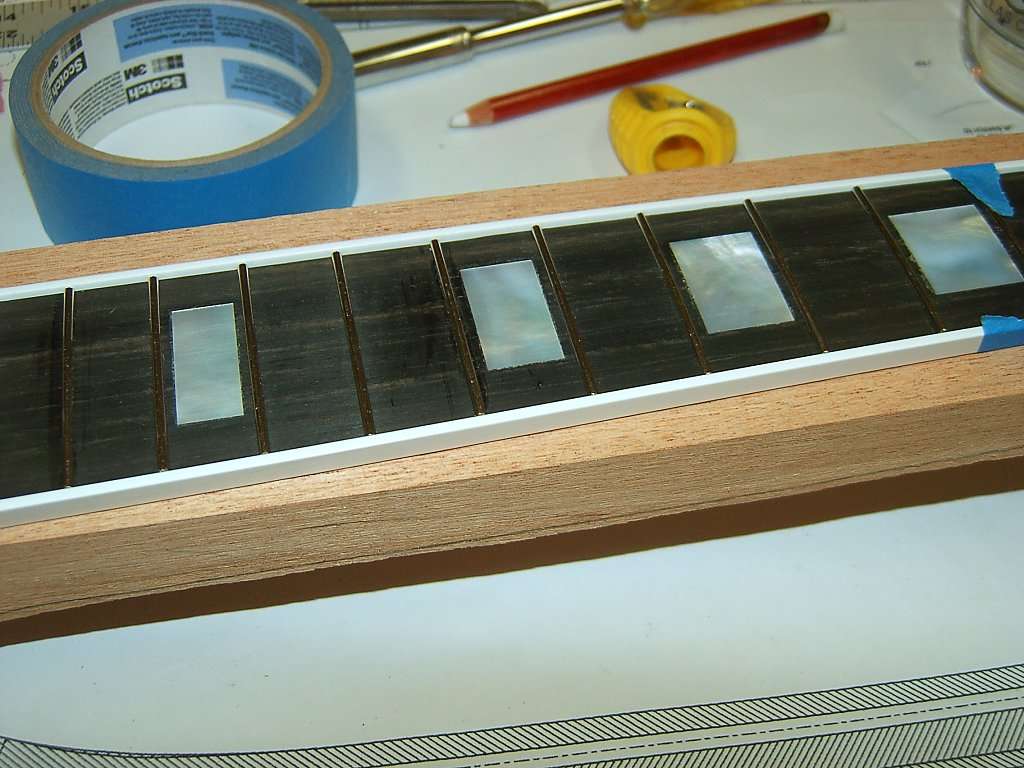
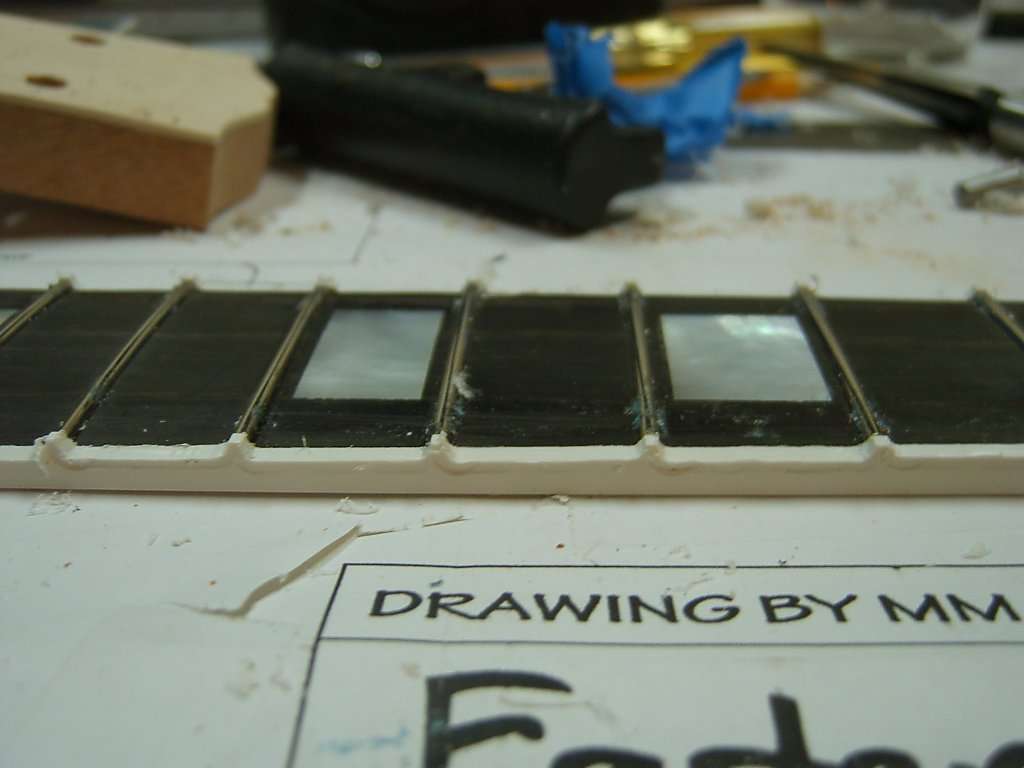
the binding glued up... next is knocking it down between the frets to form the nibs...
btw, i just used the superglue gel for the binding...
here's the technique i use to cut down the binding and create the nibs... thanks Ex-Nihilo
first i stick a dremel bit in backwards into the dremel...

then i wrap the end of the exposed bit with tape to protect the fretboard. leave just about 1/8" of the bit exposed...

i stole this picture from ex-nihilo (giving creadit where it is due), but this is the final step in bringing the binding down even with the fretboard...
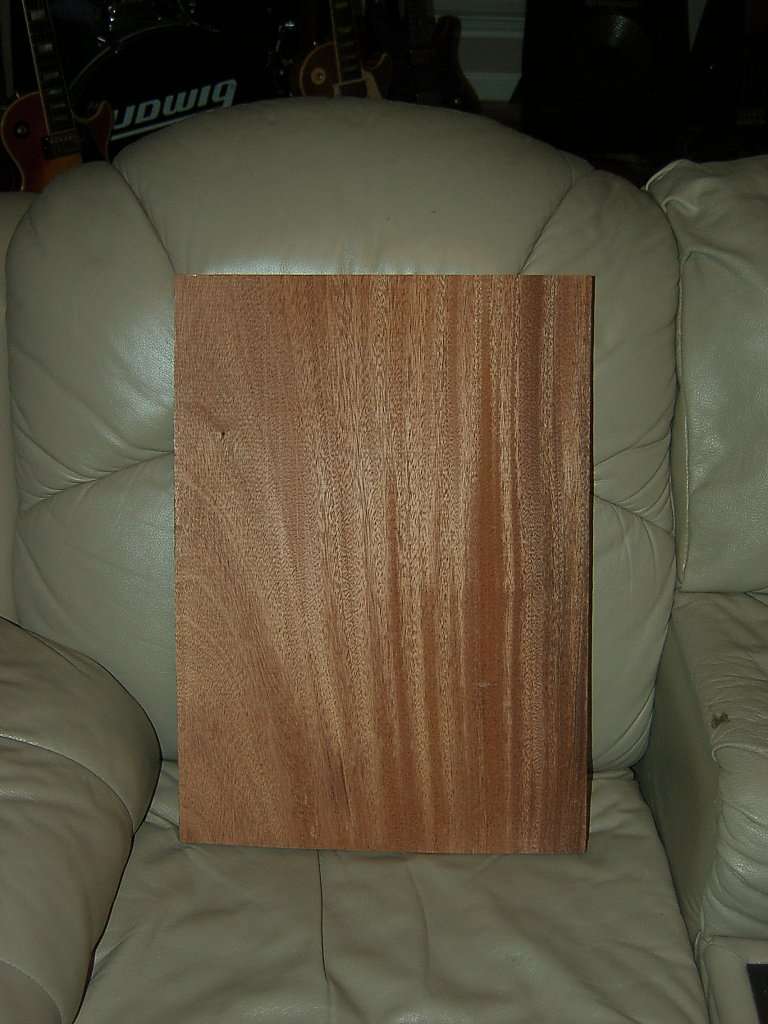
and now my mahogony...
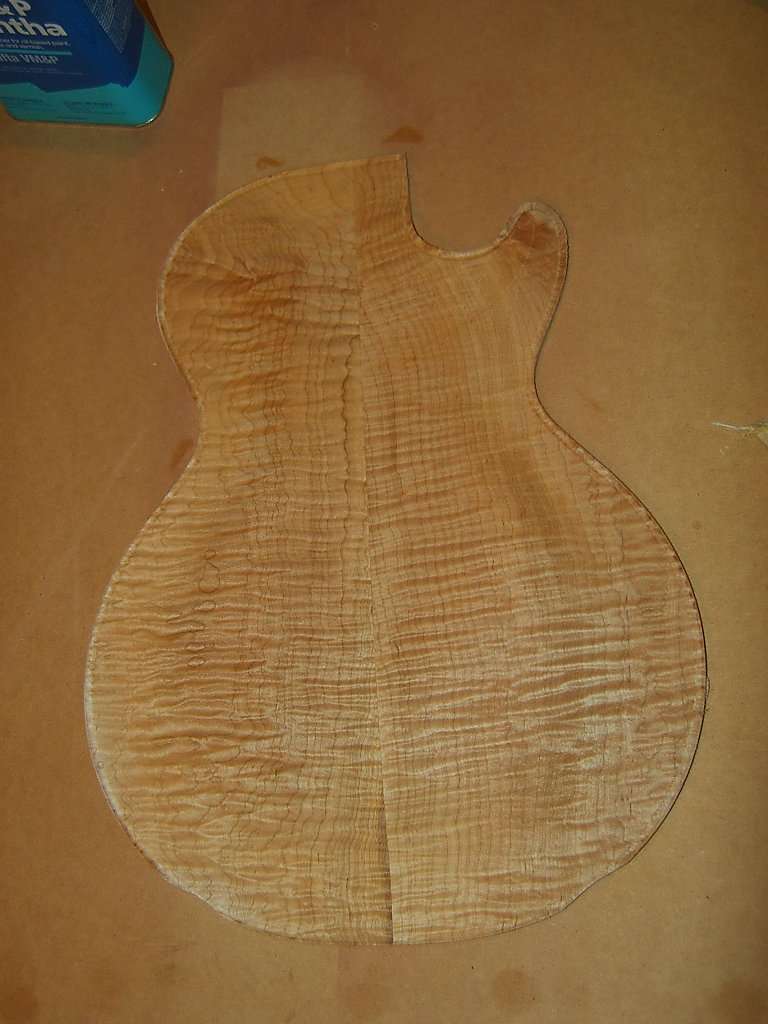
my 1 piece mahogany body...
some sexy wood !!! and heavy...
and one more pic from the side after the razor scraping...
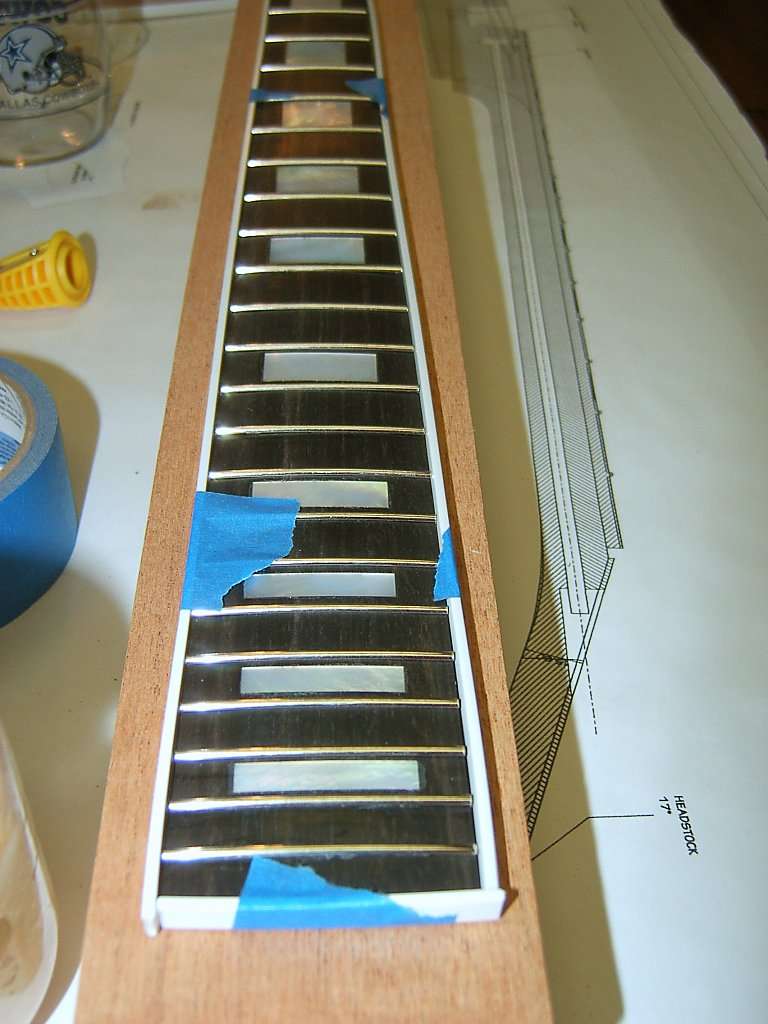
this is all followed up with a fret file to help shape the nibs and then some 220 grit sandpaper and then 400 grit to finish everything off...
be careful with the sandpaper. if you stay in one place too long you will melt the binding...
first i angle the binding over the frets with a flat file...
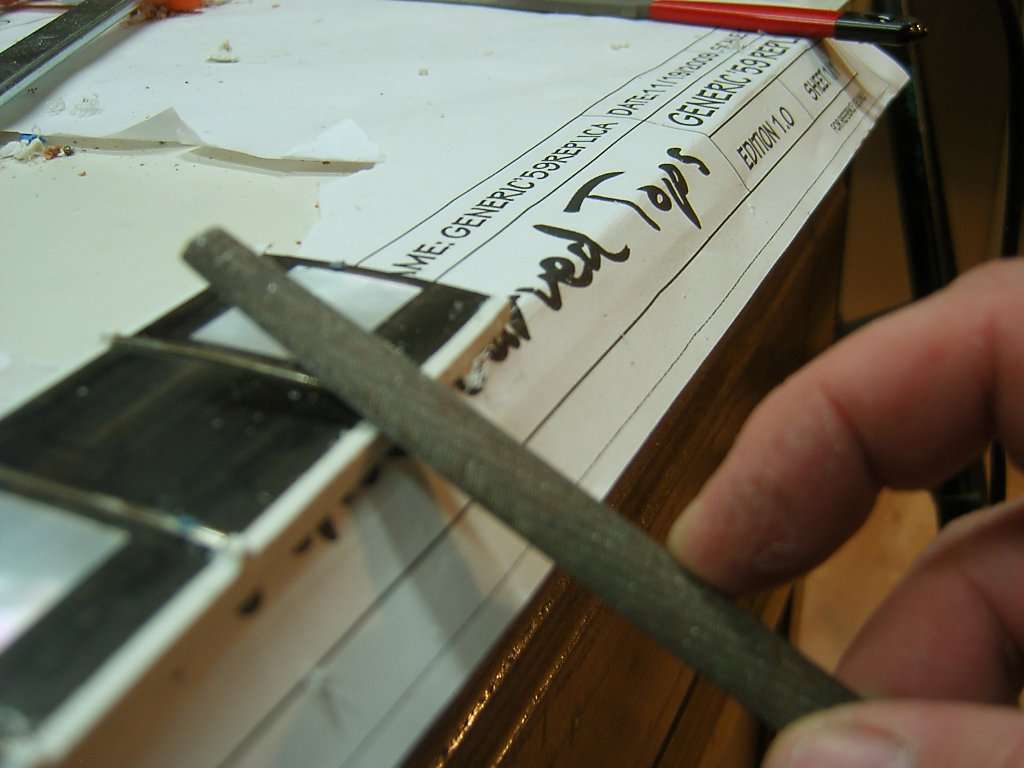
next, i use a fret file bring the binding down to fret level....
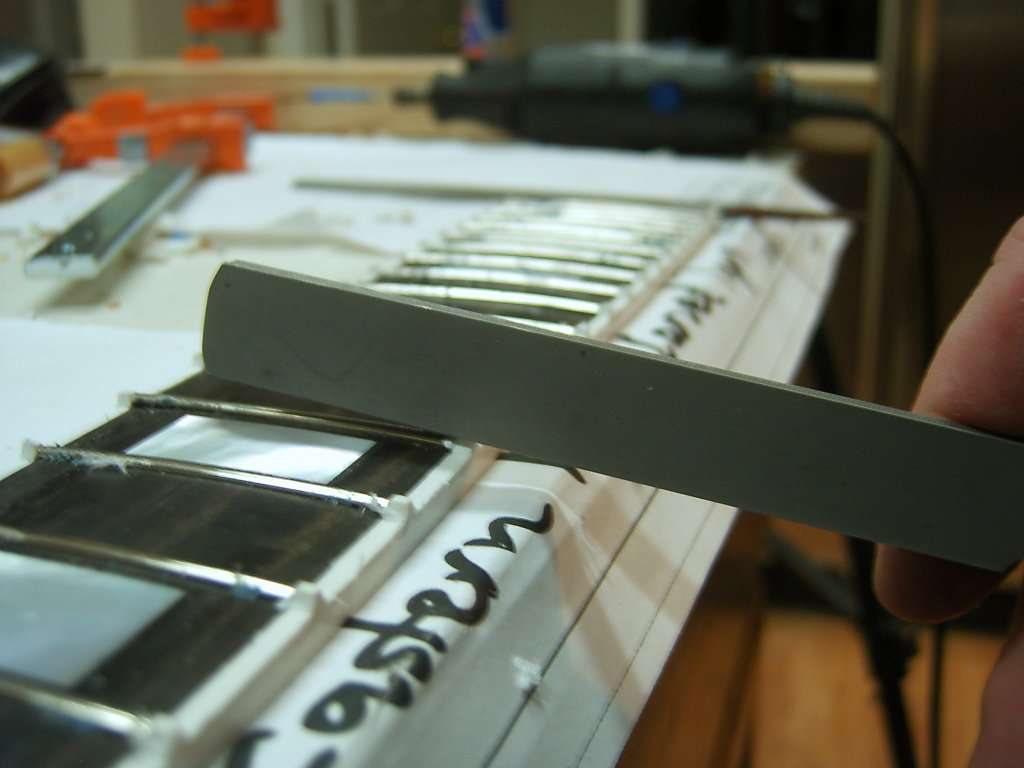
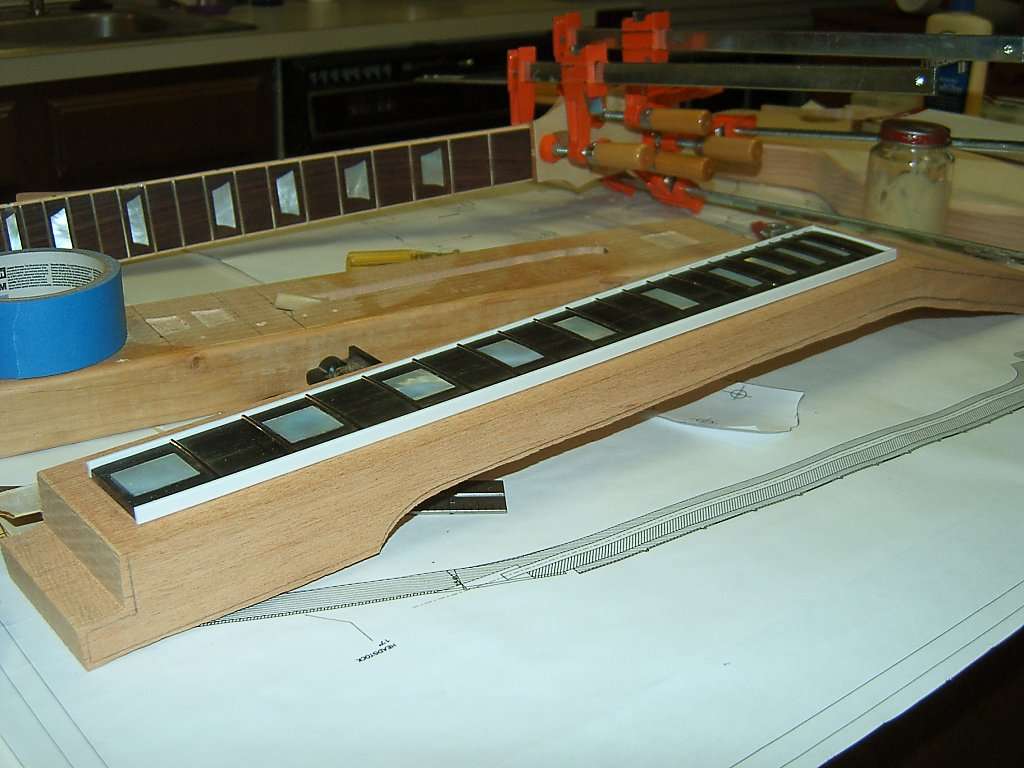
after a little sanding with the 220 grit...
still have to go back and clean up the fretboard and do a little more sanding...
then further down the line after applying the binding to the body of the guitar, i will create a acetone/binding glue dubbed "binding goop" by some HC member. not only is that good used to glue on the body binding, but it's great for filling in little spots on the binding that might need filling...
there a few where i hit the binding with the dremel chuck. later in the thread i will fill those and sand them to invisible
just a little more cleanup needed on the fretboard and then filling/sanding the dremel check marks, but she's looking pretty good
btw, the glass that has cut up pieces of white binding is the first ingredient for the "binding goop"


you can clearly see a little left over tape i didn't get in this pic. my camera macro can be better than my eyes by a long shot

when i started buying tools to build guitars i discovered a planer to handle a guitar width was going to be very expensive (around $500 for something that can plane 15" wide). however i found a solution right here on this great site
And here's a picture. It's basically a jig that allows me to use my router to plane each side of the body wood... this pic shows the wood held in place by scraps of wood and two 1x3 pieces of pine that also play the role of side rails...

there is also a router carriage that glides along the rails keeping everything level. here you can see several different sets of holes. they are used to locate the router is different locations depending on the width of the piece of wood being planed... the only requirement with this jig setup is you can only do half of each side and then you have to spin the router carriage around 180 degrees for the other side. no biggie...

base of the router mounted...

and the router in the base and mounted...

in the case of this piece of wood it was in good shape and did not need much wood removed. here is a shot underneath the router carriage at how i have the depth of the bit set...

here you can see the first couple of passes and where wood is being removed...

and here is a video clip of the action in progress...
planing with the homemade jig...
quick hit with the orbital sander to insure i got each square inch with the router bit...
and a final sanding with a sanding block to finish off side 1...
planed and sanded... that little jig is totally awesome. there was just the slightest of imperfection in the squareness of this blank, but now it's totally flat on both sides.
Side to go against the maple. this would be the exposed back except for that tiny little knot right in the middle

Side exposed on the back. the little mineral mark in the grain (or whatever that is on the right side, will almost be eliminated after the cut)...

here's the trio...

time to draw

ready for the bandsaw... woohoo !!!

i have rough cut the body. this is some tough mahogany !!!
my bandsaw is acting up badly... i cleaned it up and made adjustments to the tension and guides/bearings. the thing is still stalling out when i try to cut
so i went with my jigsaw which never cuts a vertical 90 degrees, but i made sure the flex in the blade was moving away from center...
here's the rough cut...

next i used my oscillating belt sander to ensure all sides were squared up.

and finally i start working on the final shape with the spindle sander...

i go back and forth between the belt sander and spindle sander. the spindle sander must be used for the inside of the horn, but a combination of the two will get the job done
second, mark asked me if i could post this thread here at MWGL.... if you have already followed this at HC or MLP just go with it
anyway, let's get on with it...
here's the carved top i bought for this build. if you would like to know how to carve you own top, check out the Cedar/Aspen Build link in my sig...
here's my stewmac ebony fretboard and mop inlays...
this is what i am thinking about doing with the colors...
The Plan:
Mahogany Body (one piece blank, purchased from HC member)
Mahogany Neck 24.75" (blank purchased from Grizzly)
Maple Top (pre-carved flame top purchased from Eastern Maple Carved Tops, Thanks Tom !!!
)Ebony Fretboard (Stewmac)
Custom Style Inlays (Stewmac)
Holly Headstock Veneer (Eastern Maple Carved Tops)
Bone Nut
Not sure on hardware or pickups yet...
here's the neck blank from Grizzly... enough for two necks...
inlays numbered and laid out on the ebony board
shaved the back of the board down until it was about 3/16" thick. i collected the sawdust to use to make filler later.
taped up and ready to go
i centered the inlay and drew an outline of it.
next i used a razor blade to score the board and cut away the tape.
aligned a straight edge to help the dremel cut clean and straight...
1st inlay slot cut...
inlay work...
in the meantime, i did a very rough cut on the neck...
inlays cut, fret slots covered, ready for ebony filler...
the magic goop: testers model cement and left over ebony sawdust...
all the gaps filled and drying...
ready to trim to size and sand the filler and inlays down to the 12" radius...
trimming the fretboard using my table saw. i use double sided rug carpet tape to hold the board in place.
then i created a jig to keep the radius block on center while sanding the inlays down to meet the board. again, double sided rug carpet tape to hold the board in place.
i went from 100 grit up to 800 grit. you can see at first it's a lot of inlay coming off. sand paper is held to the radius board with double sided carpet tape, deja vu... (just wait, all the templates for routing are held with the stuff too, lol)
after a while with the 100 grit i start to get the inlays leveled down to the board... i have as much ebony coming off as MOP...
here's the trimmed and sanded ebony with a little lemon oil rubbed on it...
next i bent some fret wire to a 12" radius using my handy, dandy homemade fret bender...
finished fret wire...
btw, if you are interested in how to build the fret wire bender following this link. i wasn't gonna pay $100 from stewmac and an HC member pointed me to these plans... i used sander paper and double sided tape instead of the outdoor tread tape and the whole thing cost me about $18.....
Make Your Own Inexpensive Fret Bender
chamfering(beveling) the slots prior to fretting... just one or two drags of the file does it...
fretting has begun. use the fret cutters to cut the fret wire...
i use a fret hammer to seat the fret wire...
and then some fret pullers to remove the fret, add superglue and press back in place.
board is prepared for glue and the press...
i use gel superglue, much cleaner and less runs....
here is the three drops of gel superglue...
tapped back in with the hammer and then pressed...
quickly wipe the glue off the fretboard before it dries...
once they are all glued, reset and pressed, it's time to trim the edges.
finished
next up, glue on a white binding to the ebony board...
the binding glued up... next is knocking it down between the frets to form the nibs...
btw, i just used the superglue gel for the binding...
here's the technique i use to cut down the binding and create the nibs... thanks Ex-Nihilo
first i stick a dremel bit in backwards into the dremel...
then i wrap the end of the exposed bit with tape to protect the fretboard. leave just about 1/8" of the bit exposed...
i stole this picture from ex-nihilo (giving creadit where it is due), but this is the final step in bringing the binding down even with the fretboard...
and now my mahogony...
my 1 piece mahogany body...
some sexy wood !!! and heavy...
and one more pic from the side after the razor scraping...
this is all followed up with a fret file to help shape the nibs and then some 220 grit sandpaper and then 400 grit to finish everything off...
be careful with the sandpaper. if you stay in one place too long you will melt the binding...
first i angle the binding over the frets with a flat file...
next, i use a fret file bring the binding down to fret level....
after a little sanding with the 220 grit...
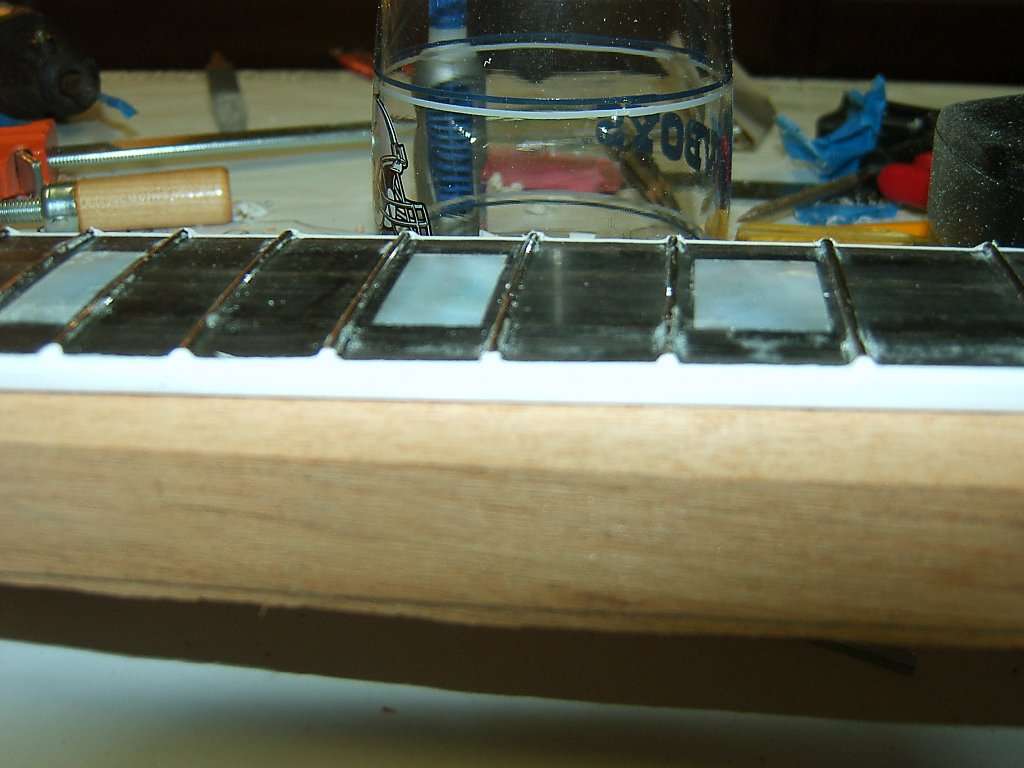
still have to go back and clean up the fretboard and do a little more sanding...
then further down the line after applying the binding to the body of the guitar, i will create a acetone/binding glue dubbed "binding goop" by some HC member. not only is that good used to glue on the body binding, but it's great for filling in little spots on the binding that might need filling...
there a few where i hit the binding with the dremel chuck. later in the thread i will fill those and sand them to invisible
just a little more cleanup needed on the fretboard and then filling/sanding the dremel check marks, but she's looking pretty good
btw, the glass that has cut up pieces of white binding is the first ingredient for the "binding goop"
you can clearly see a little left over tape i didn't get in this pic. my camera macro can be better than my eyes by a long shot
when i started buying tools to build guitars i discovered a planer to handle a guitar width was going to be very expensive (around $500 for something that can plane 15" wide). however i found a solution right here on this great site
And here's a picture. It's basically a jig that allows me to use my router to plane each side of the body wood... this pic shows the wood held in place by scraps of wood and two 1x3 pieces of pine that also play the role of side rails...
there is also a router carriage that glides along the rails keeping everything level. here you can see several different sets of holes. they are used to locate the router is different locations depending on the width of the piece of wood being planed... the only requirement with this jig setup is you can only do half of each side and then you have to spin the router carriage around 180 degrees for the other side. no biggie...
base of the router mounted...
and the router in the base and mounted...
in the case of this piece of wood it was in good shape and did not need much wood removed. here is a shot underneath the router carriage at how i have the depth of the bit set...
here you can see the first couple of passes and where wood is being removed...
and here is a video clip of the action in progress...
planing with the homemade jig...
quick hit with the orbital sander to insure i got each square inch with the router bit...
and a final sanding with a sanding block to finish off side 1...
planed and sanded... that little jig is totally awesome. there was just the slightest of imperfection in the squareness of this blank, but now it's totally flat on both sides.
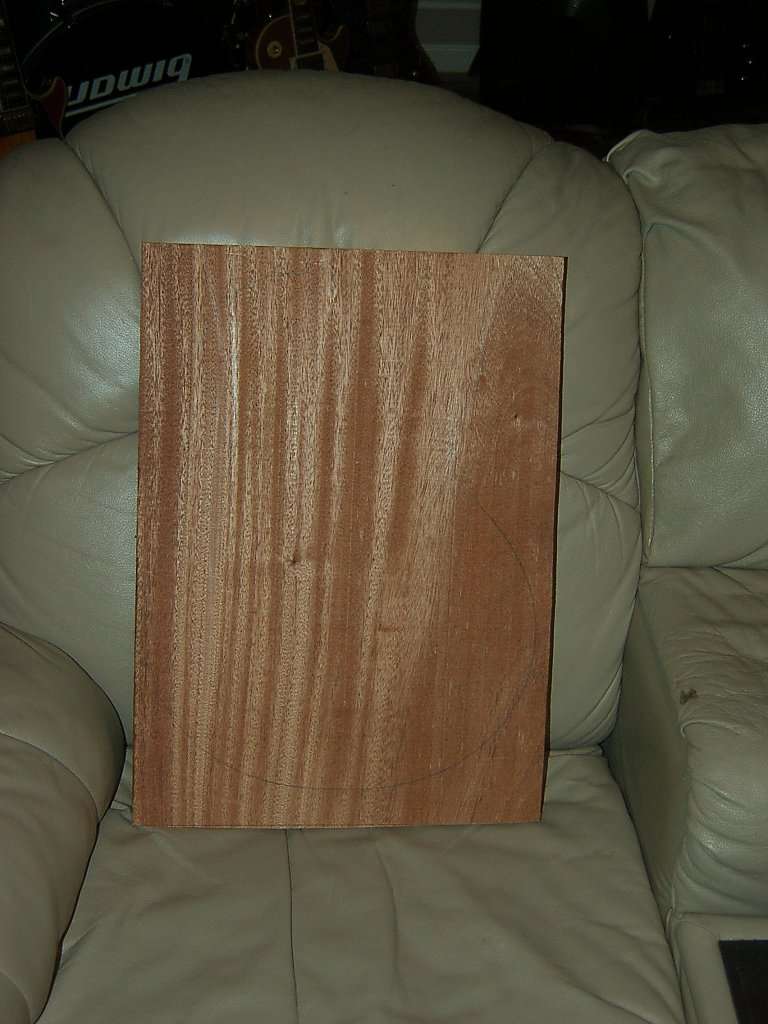
Side to go against the maple. this would be the exposed back except for that tiny little knot right in the middle
Side exposed on the back. the little mineral mark in the grain (or whatever that is on the right side, will almost be eliminated after the cut)...
here's the trio...
time to draw
ready for the bandsaw... woohoo !!!
i have rough cut the body. this is some tough mahogany !!!
my bandsaw is acting up badly... i cleaned it up and made adjustments to the tension and guides/bearings. the thing is still stalling out when i try to cut
so i went with my jigsaw which never cuts a vertical 90 degrees, but i made sure the flex in the blade was moving away from center...
here's the rough cut...
next i used my oscillating belt sander to ensure all sides were squared up.
and finally i start working on the final shape with the spindle sander...
i go back and forth between the belt sander and spindle sander. the spindle sander must be used for the inside of the horn, but a combination of the two will get the job done
Last edited by a moderator: