Doubleneck Bass/Guitar build

FarToMany

Does not like change
First off, i want to thank Mark for this great site and allowing us refugees to be here. I was poking around at this and other sites that many have been driven too and this one feels the most like home with a familiar setting and familiar faces. That and it seems Mark is willing to accomodate and make changes were needed without getting all corporate on us, something that i don't think many of us want to experience again. So thank you again Mark.

Second off, i want to thank newbuilder for giving me the final shove to come here. Its that kind of camaraderie that made the previous group what it was.

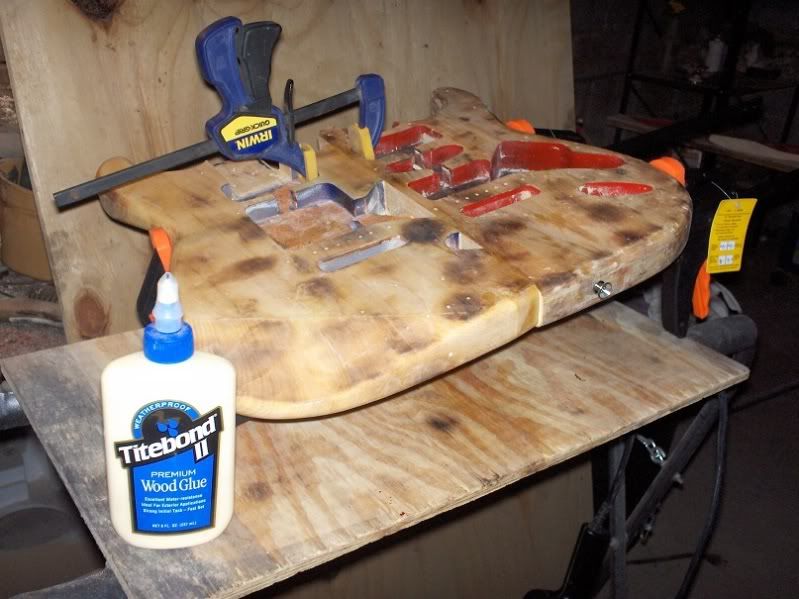
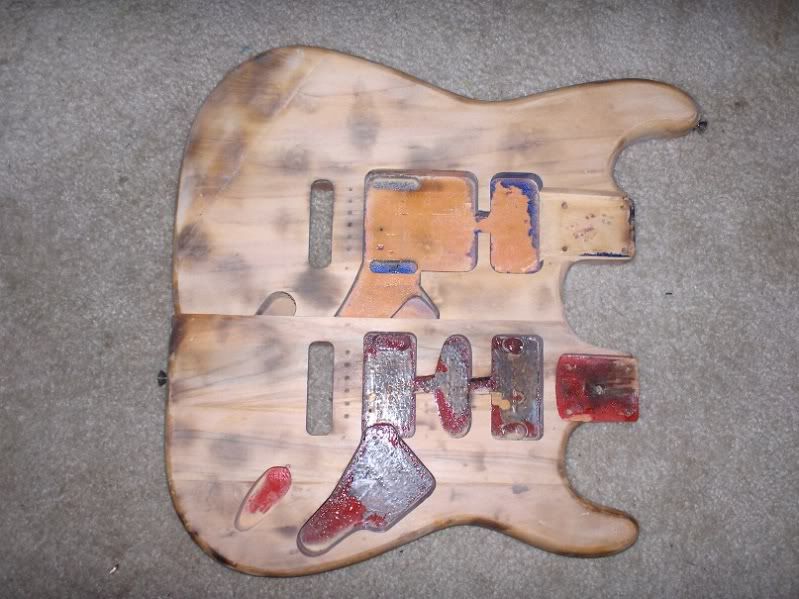
Now on to the build. You will have to bear with me untill this is all caught up, as i will be copying and pasting the previous thread for the "other site" here. But essentially, this is my first dive into a more dramatic build other than just bolting a bunch of parts together. So let it begin--again, these initial posts are from Febuary 2010


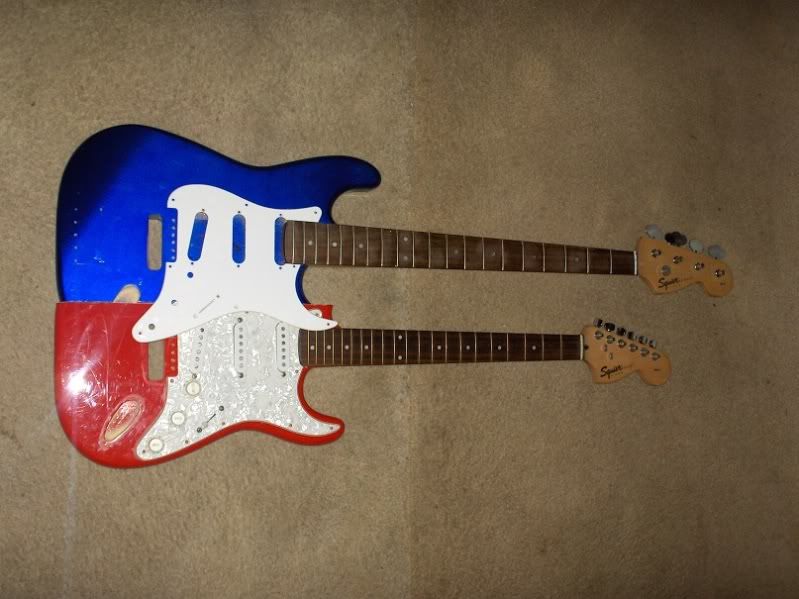
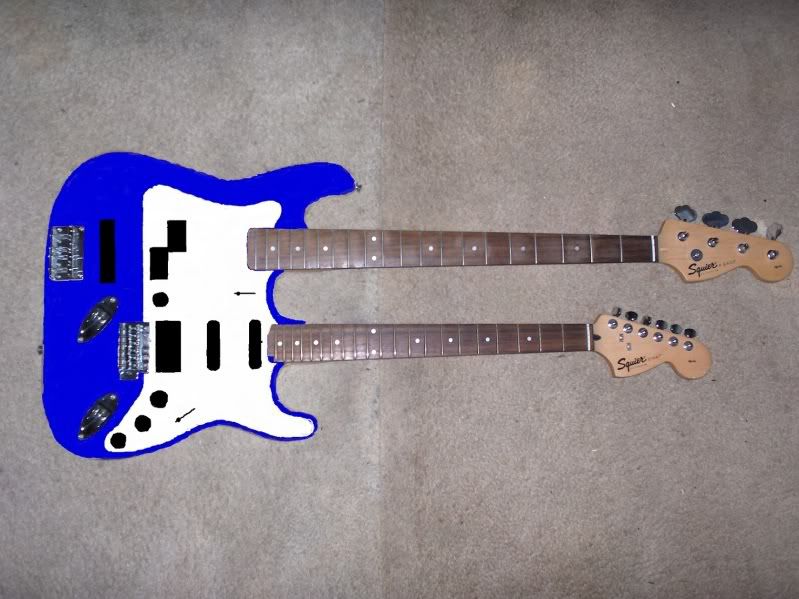
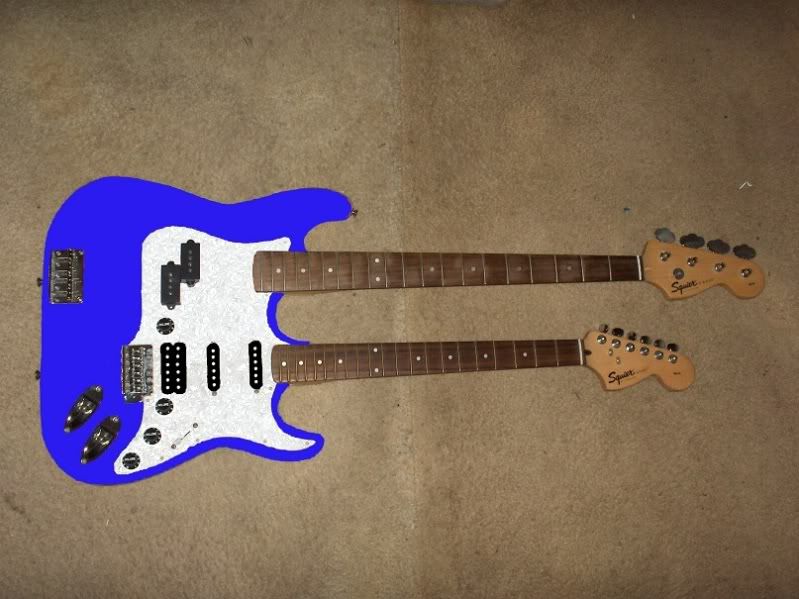
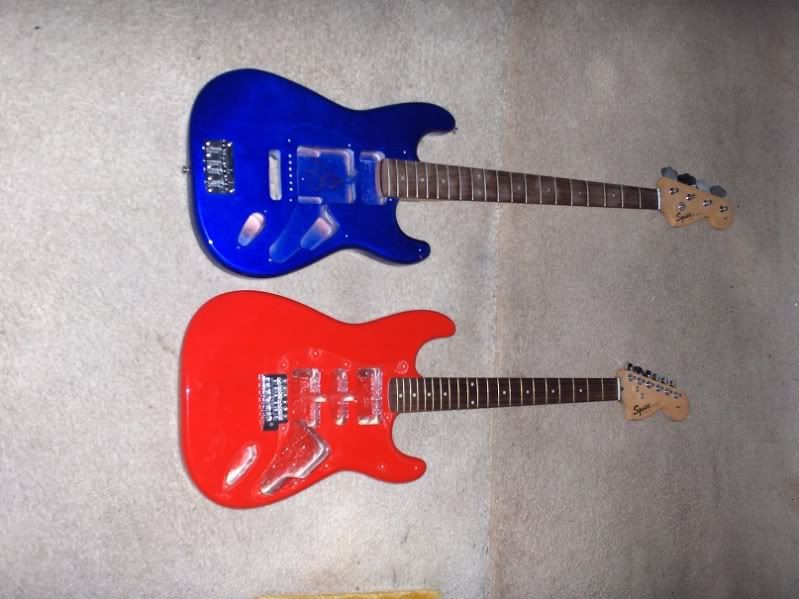
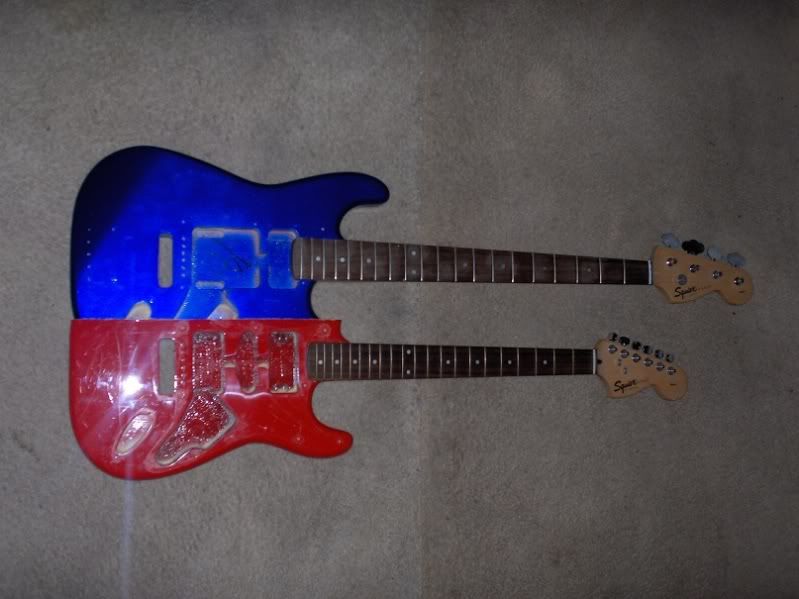
I have always wanted a double neck---although i know they are not really practical, so here is what i came up with.

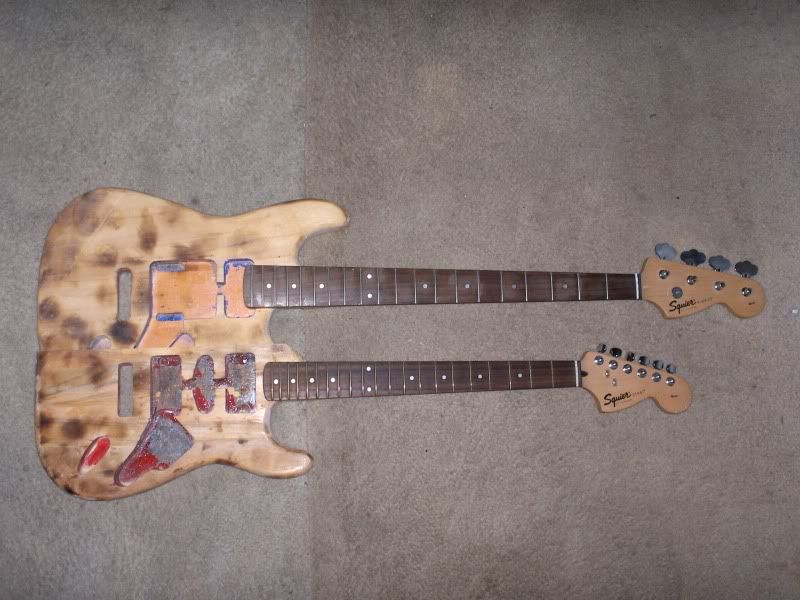
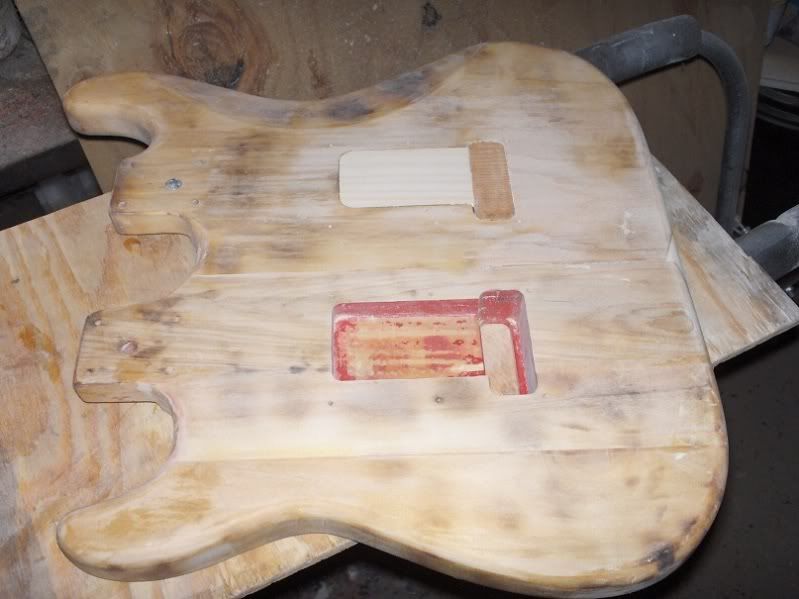
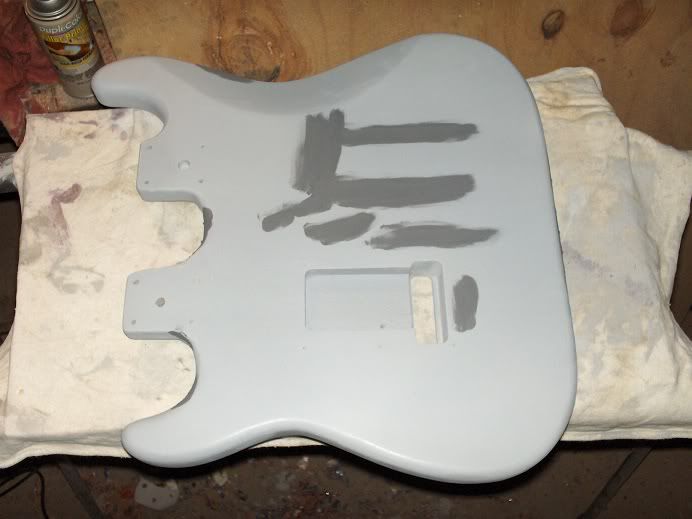
I like playing bass, i had started the bass/strat bodied project a while ago, but had a mishap when the body slid off my workbench and chipped the finish badly. It just kinda hung around for about a year. The goal was make a stratish style bass. Its a standard long scale setup.

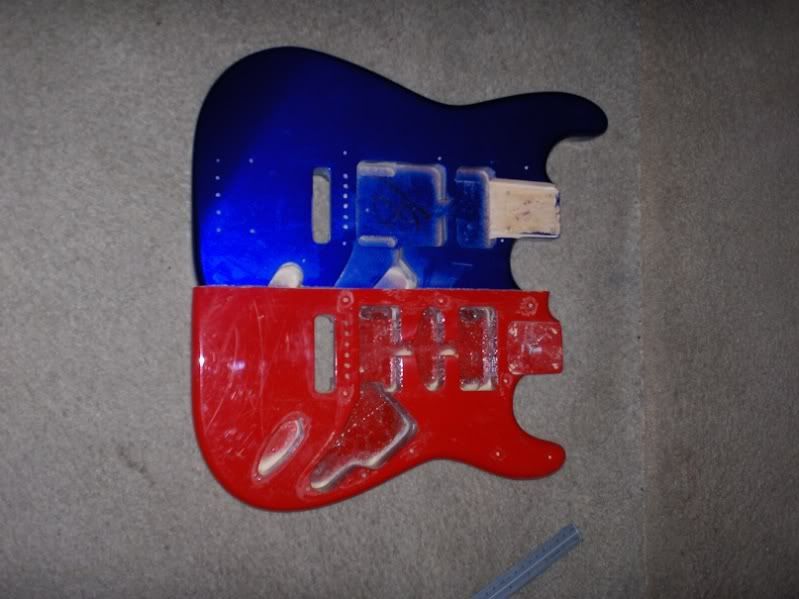
The guitar is another squier i aquired off of c-list, although not shown in the pic, i did buy it complete. This now gave me two bodies that were the same thickness. Between the two, i have about $160ish in all the parts that have accumilated over time.


doubleneck1.jpg
 
Last edited:
First step was formulate the plan in cutting. I had to take into consideration all the contouring that is on a strat body. I knew there would be some filling going on so to minimize it, i had to decide where was the best to cut. What you see is the after, what you dont see is all the careful measuring that took place, laying out with tape and the multiple cuts it took to get here.

Next up is to glue it all together.

So this is where i am at for now, i'll update as i can in my busy schedule.

doubleneck2.jpg


doubleneck3.jpg
 
Now THIS is a build I've never seen done before...very cool! :thu:

And welcome to the site...I'm incredibly happy that you guys like the atmosphere here enough to want to hang out :)
 
Thank you for the welcome Mark.

I have heard myself of builds like this before, but finding any info led me to dead ends. Well, as i always tell my wife, how i learned to do things was just to dive in, and learn along the way. I have learned somethings so far in the build and will untill the end. I want everyone to know i do not have a fully outfitted wood shop, so some techniques used here are a little shadetree i have to admit. I am much more suited to work in metal and on cars, but i played guitar long before i could drive and love to tinker.

I could have started from a large section of wood or bought a pre done body (have you priced those things?---yowzzers!! $$$$), but its much more fun to cut things up and do a budget build.
 
Last edited:
Thank you for the welcome Mark.

I have heard myself of builds like this before, but finding any info led me to dead ends. Well, as i always tell my wife, how i learned to do things was just to dive in, and learn along the way. I have learned somethings so far in the build and will untill the end. I want everyone to know i do not have a fully outfitted wood shop, so some techniques used here are a little shadetree i have to admit. I am much more suited to work in metal and on cars, but i played guitar long before i could drive and love to tinker.

I could have started from a large section of wood or bought a pre done body (have you priced those things?---yowzzers!! $$$$), but its much more fun to cut things up and do a budget build.

I think it's cool watching al of the build threads around here the different approaches to this sort of thing. I was planning on doing a Warmoth build this year (not sure I can afford how I want to do it) but it might be fun to at least make a body....I'm starting to get the courage up after watching you guys :)
 
PLEASE NOTE: Some of these responses lose a little as you dont see all the other replies from the previous sites thread, if you guys have any questions, feel free to ask

I am stripping the bodies right now. You know how it goes with poly finishes, slow and tedious with a scraper and heat gun. Once they are stripped, i will glue them together with some tite-bond and clamps. I might add a couple of hidden screws just for good measure.

I will make one pickgaurd for the whole deal. It will most likely at this point have a three way Gibson style switch for the two necks----although i was just thinking i may put a tele-3 way in to match the 5-way on the guitar. Regular strat controls for the guitar, not sure on the bass side yet what i am going to do. I am sure the wiring will be an exersize in fustration---and i like to wire things.

Had some time this morning and got the red side stripped. Tonight when i get back i'll see if i can glue and clamp them up so i can resand and start filling imperfections and whatnot.


doubleneck4.jpg


doubleneck5.jpg


003.jpg
 
Surfdude wrote: From HC on Feb 15, 2010

Did you glue it up yet?

I would suggest taping it together, put a strap on it, install or tape the tuners to the headstocks and check the balance. I'm thinking the bass half needs to be slid back a bit or it will be neck heavy. That would also take care of the little spot that needs to be filled.

Or it may have to be slid a bit forward. I can't think straight this morning. Just check it before glueing.

Surfy


You must have been reading my mind. I just got done doing that, and i was pleasantly surprised to find it wasn't overly neck heavy. My EB-3 long scale bass dives more than this thing does. I did try moving the two halfs around to find it really didn't make a difference at all. What i did notice that helped the neck heaviness was i used the bottom strap button off the bottom half and it seemed to help stabilize it better over the top half, so i will use that spot instead of the top one.

Time to glue it up, i went out and got a couple longer bar clamps this morning.

doubleneck7.jpg
 
Oh cool!!! :thu: I missed this build thread over in HC. I'll have to keep an eye on this! I've been intrigued by doublenecks for a long time, but I prefer the 6-string/Bas of 6-string/baritone, over the 6 & 12 string ones.
 
Ok, glue was setup, had a few minutes with the router and palm snader to smooth the joints and rough out the mismatch shape between the two body horns. Progress is slow, i wish i was a kid again with all sorts of free time. So here is a pic to cure all the bitchin' of the body joints.

doubleneck8.jpg
 
Had a couple hours to kill today so i made my 2nd grade looking rendering. I think the blue is going to be a mettalic, but whatcha think over all?

doubleneck9.jpg
 
OK, after strapping this thing on, i made some revisions to the drawing. I moved the bass jack plate, pretty much got the knobs sorted out, the neck select switch will be a mini switch between the two necks.

The only thing i have not figured out is the bass pickup selector. I have no idea where to put that. My only idea at the moment would to be where the old bass jack was, and making just a flat strat shaped plate to mount the switch in. Its quite crowded with all the controls and making them so they are not in the way of each other and being able to play the thing without the controls being too obtrusive.

Anyways, the updated pic....

doubleneck92.jpg
 
Yea, i think i might just do that and just use the volume control to turn the bass on and off. If it becomes an issue with playing, i can add a switch later i guess. Honestly, the more i think about it, i would only be playing this thing if i need to jump around between both, which means both would be on anyhow. Ok, that settles that.

Had a minor setback today. While tapping the plugi made to fill the bass side original output jack hole, i hit it to hard i guess and split the wood in the back. I have that glued and setting back up. Good thing its going to be a solid color as i can build the filler/surfacer to fill in any small imperfections. I also filled the trem cavity on the bass side and added a small piece for the bass bridge to sit on as part of it was hanging off where the forearm cut was. I'll let it all sit up for a couple of days. before tackling it again.

doubleneck10.jpg


doubleneck11.jpg
 
DARKSTORM from HC on Feb 22, 2010

Since your useing mini 3 way neck selector switch, you might be able to put the basses 3 way pup selector by it between the necks. You'd have to decide wether the switches move horizontal or vertical to body. But vertical might better allow for fairly close spaceing between then with the two switches next to each other horizontally. Have you concidered black pickgaurd? I still think the rear strap button down by guitar side is gonna be problematic. I'd put it on the bass side. And the front strap button on the top horns end. Some might prefer the front strap button on end of one of the neck bolts for bass. But my exoperience with doublenecks made me stop useing that location in favor of top horn cause the lower position can make the body more prone to tilting over away from you making fit to body a bit awkward. For wearing the thing on strap, Ive allways found wearing it as low as comfort playing allows best playing. So youd position guitar side a little lower then you would a single neck but avoid it being so low that you want to allways lift the instrument when playing it.

Whats body weight at the moment? I see a couple ways you could cut that a little and also possibly give the rear of body a curve cutout that could improve fit to body.

Also how about useing stacked pots so that the 3 knobs become as is for one side for guitar and wire the second pot of each set so is vol, vol, tone, for the bass side. Where the bass control knobs are now is gonna be pesky at times when your playing the guitar side.

DARKSTORM:

Now that it is glued up, i strapped it on again to try the strap buttons. I am going with the one more up on the bass side as it did seem to help a little with neck dive. So i will fill in the lower one a little later.

I also do not know what the body weight is, but its not bad feeling anyways and i can tell you overall it doesnt feel as heavy as a couple of my guitars do. I think my Epi EB-3 bass is actually heavier than the doubleneck is. I attribute that to the thinner Squier bodies and the fact they make them out of bass wood---or so they say.

I thought about stacked pots too, i dont know yet. But any way i slice it, its going to be interesting wiring this thing up. I also thought about the 1/4' stereo output jack as was mentioned earlier above, but i think i like the uniqueness of the dual strat outputs on there.

EJD: from HC Feb 22, 2010

And... not to piss all over your bonfire or anything, FarToMany, but:

http://www.warmoth.com/Guitar/Bodies/DoubleNecks/DoublePrecisionStrat.aspx

I want one, and I want one badly. I think I'd have the bass on the bottom though... not sure.


EJD:

Yup, saw those bodies when i was searching for doubleneck info. They are really cool and have the price tag to match, throw in the cost of finishing and your up there for sure. Plus , thinking ahead, as i mentioned above, i felt the Squier strat bodies would be lighter and help with the overall weight----the Warmoth body looks way heavy, i had a P bass body of thiers years ago and it weighed a ton. Nice solid wood though.
 
Ok, all the major voids are filled and sanded level to the body. Next up is to do some more filling with some filler and spot putty, then maybe i can get a quick coat of primer on to see where trouble spots are.

doubleneck13.jpg


doubleneck14.jpg
 
Put the first coat of primer/surfacer on so i could see what needs attention. It looks REALLy good in the pic, but in actuallity, i have alot of spot filling to do yet. I also need to route the second jack hole too. I have just been crazy busy lately so i haven't had any time to work on it. I bought paint, hope to do a test sample this weekend. But anyways, here is a pic to keep you going.....

doubleneck15.jpg
 
WE ARE NOW UP TO DATE WITH THE BUILD

I have a few new pics from this week that need to be posted up still


Yet another newer updated Etch-a-Sketch pic. I am not sure about losing the rear jazz pickup, but i need to decide soon so i can route the body if needed. It alieviates some problems in control placement, but leaves me limited on tonal possibilities. Whatch ya guys think?

doubleneck94.jpg
 
Last edited:
OK, i used the jack cup turned upside down to use it as a template, i then used a pencil to lightly sketch where i wanted to cut out. I managed to use my dremel tool, with a router bit and free handed it to route the second jack port. I also did some more filing of nicks, bumps, and bruises using and automotive spot putty from NAPA. The primer is Duplicolor filler/primer and also helps to fill in small imperfections. I just finished some more sanding, but this process of filling/priming/sanding will repeat untill i am happy.

I haven't talked alot about finishing yet and some of this i take for granted because of my use of doing it on cars. But basically, once i get where i am satisfied with the rediness of the wood, i spray a primer filler. I have spray guns, but its a bich for the use and cleanup, so for small stuff like this body, i just resort to spray cans. A primer filler does exactly what it says, it primes and fills. If your on bare wood, its going to suck it in the first few coats. Do this and let it sit for a bit so it can aclimate and dry and expand/contract with the surface.

Then comes the sanding. I like to wet sand, but i dumbly forgot about how wood and water dont get along well. So after letting the wood dry out for a couple days, i resprayed the primer. Sanding filler dry will use up sandpaper fast. I get it all roughed in with 220 dry. Then i will slightly damp the paper (make sure to use a wet/dry paper) and lightly hit the areas i just went over, then do the same with a damp piece of 320. Anywhere you use filler, try and feather the edges in. If possible you do not want to sand down so you end up with just the spot your trying to fill, because i can almost gaurentee it will show up under the paint--so feather the edges out from the repair area if possible.

Notice the feathering (gradual fade in) in the pics of the filled and bare wood areas.

doubleneck16.jpg


doubleneck18.jpg


doubleneck17.jpg


doubleneck19.jpg
 
Last edited:
Back
Top