dougk
b00b
I'm not sure how many builders hang around on here, I'm sure plenty but I thought I'd throw this out there. I'm more of a guitar builder thank a luthier IMO but I'm happy to offer advice, insight or at the minimum, if I know someone else has a good answer, where to go. If I don't know the answer (probably most of the time LOL).
I'll kick it off. I posted this a couple years ago on facebook but this is how I slot nuts, quickly and right to the depths I want every time.
Tools you'll need:
5 dollar set of "tappet feeler gauges" available at any autoparts store.
Set of nut files (don't skimp, you'll get a life time of use out of them.
optional extra: files for shaping the nut
masking tape
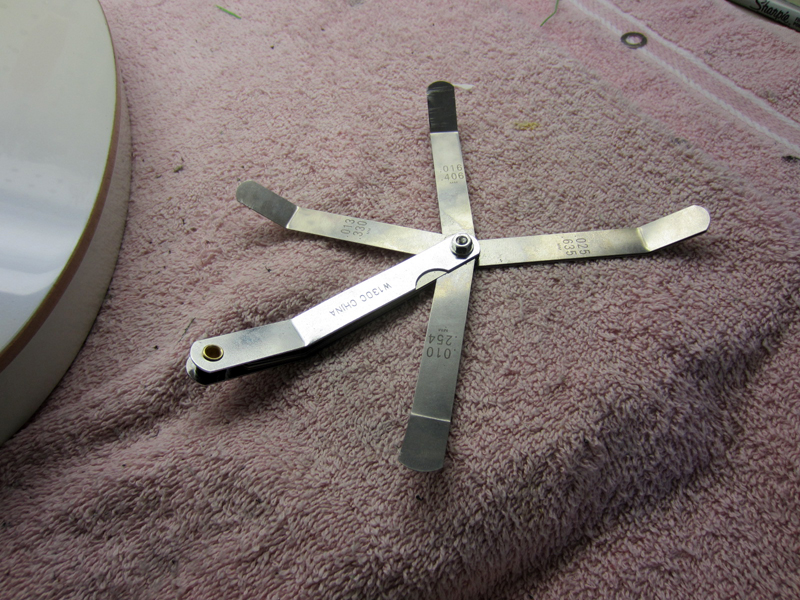
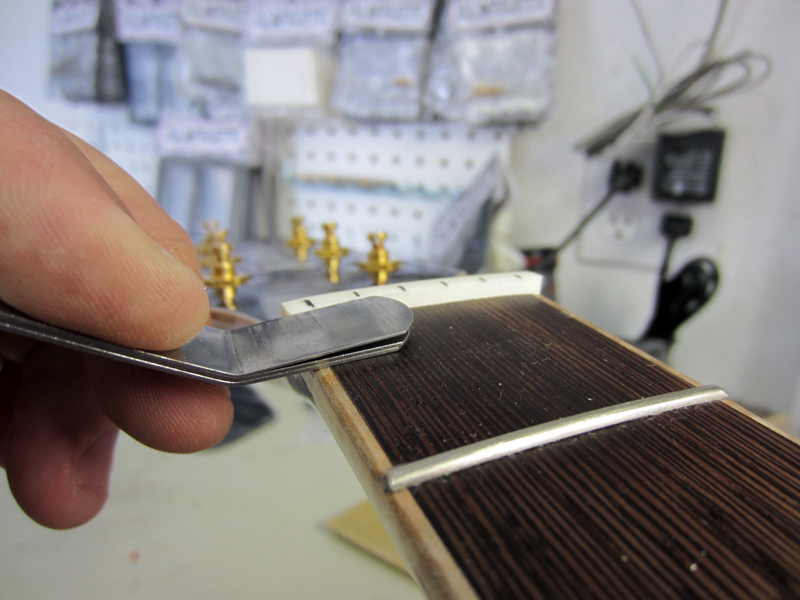
This is your feeler gauge set. They come in straight and angled, I like the angled. (Recently Stewmac started selling their version of this, which I'm sure is much easier to hold and more expensive. Auto store ones are fine).
They will typically have about a dozen to two dozen different thickness gauges. This set of .005 to .026 iirc

Next take a straight edge across the first couple frets
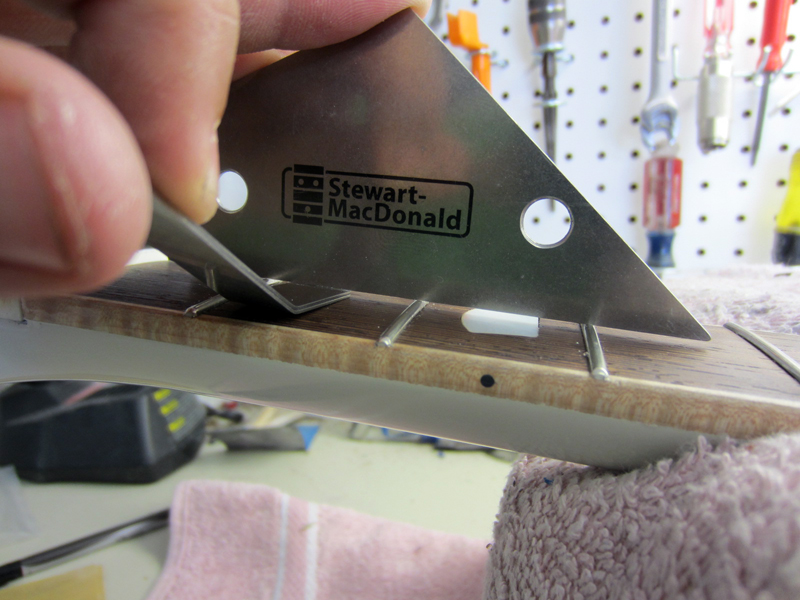
and stack up your feeler gauges till it just touches the straight edge to find your fret height.
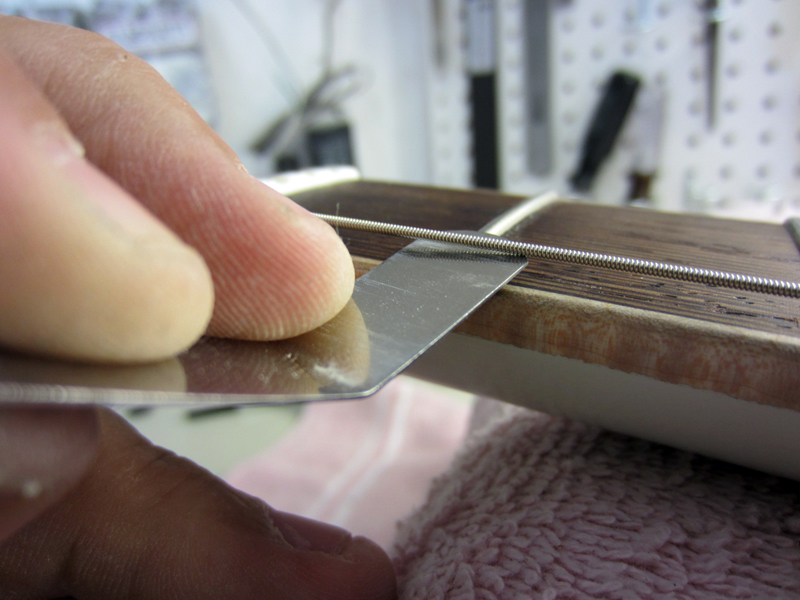
This picture is a little out of order and will come up again but what I recommend is, go around to your favorite playing guitars and measure the string height off the first fret. If you want, you can capo at the 12th fret and then again at the 5th fret if you play with very tall action / lots of relief. Stack the gauges again (if needed) till you just make contact with the string.
I set our guitars up with .016" off the first fret. This is plenty low but gives a fair amount of life in the nut (you can can take it down to .010 or less if you want but I find they will almost certainly buzz with changes in the neck, weather or frankly a dozen or so string changes). At the 12th fret I do .050-.055" height with .005" relief.
The key is here, to start putting numbers to actions you like instead of "this feels right" and "ohhh :holds fingers apart: bout this much". Once you can start writing down your favorite specs, it's easy to set up other guitars to match or be aware of how the weather is affecting your relief, setup ect.
Now that you have a number to work towards, simply add your desired height to your fret height and you are set. In my case, our frets usually end up right about .050" in height after level and crown and I like .o16 so I stack .016, .025, .026 (based on what I have in my set).
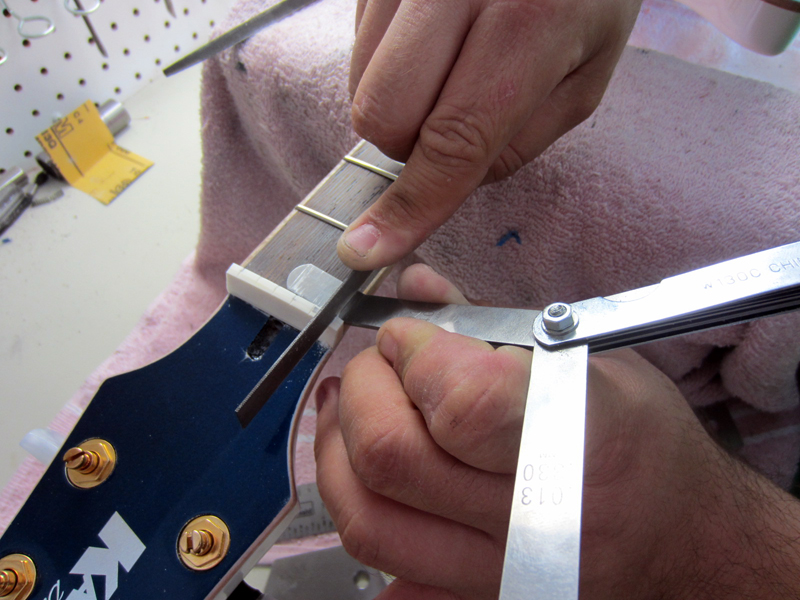
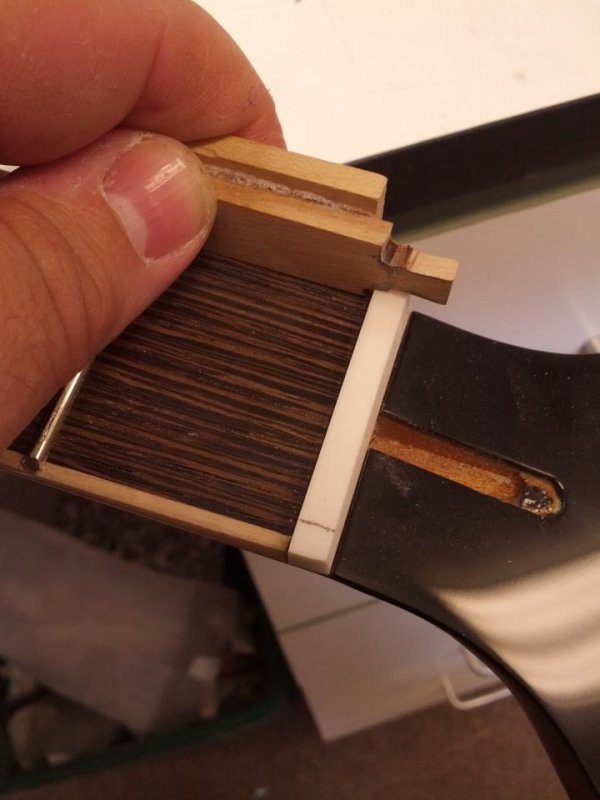
Now after marking your string spacing, file down till you just touch the feeler gauge. This will get you on the money almost every time. If you want, you can start conservative and check your work...
by stringing it up, and measure, verify or cut some more. Lets say you slotted everything till you touched the feeler gauge and when you measure you have .020 instead of .016". Just remove .004" from your gauge set and file some more.
Word of warning, verify capo'd around the 5th fret before you cut any deeper. If you have the bridge set very tall or relief set very large, you can get an artificially high reading at the first fret.
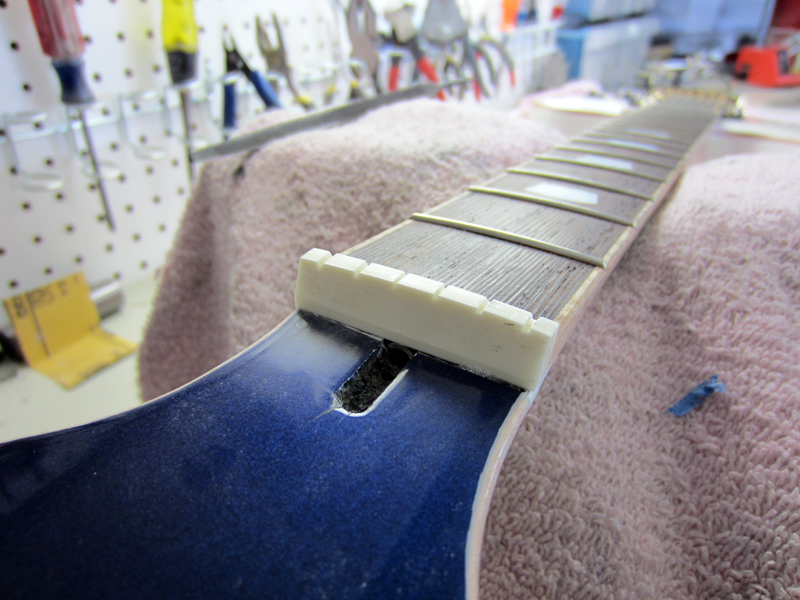
Work your way across and you're done! Then you can shape the top of the nut to your preference.
Super easy. Useful for not only new nuts but improving lower priced, poorer playing guitars. Most of the budget guitars really just need an extra 20 minutes attention at the nut to bring string height around, solve binding ect.
Hope this helps! I'll see what other things I can come up with for you guys.
edit: this is StewMac's new tool which is the same concept for 63 bucks: http://www.stewmac.com/shop/Tools/S...lot_Nut_Guard.html?actn=100101&xst=1&xsr=1811 Looks slick and I'm considering it just because I do this so often that I could probably justify the cost. It is a bit tricky to hang onto the feeler gauge set AND file but these files at a parts house are 5-10 bucks.
I'll kick it off. I posted this a couple years ago on facebook but this is how I slot nuts, quickly and right to the depths I want every time.
Tools you'll need:
5 dollar set of "tappet feeler gauges" available at any autoparts store.
Set of nut files (don't skimp, you'll get a life time of use out of them.
optional extra: files for shaping the nut
masking tape
This is your feeler gauge set. They come in straight and angled, I like the angled. (Recently Stewmac started selling their version of this, which I'm sure is much easier to hold and more expensive. Auto store ones are fine).
They will typically have about a dozen to two dozen different thickness gauges. This set of .005 to .026 iirc
Next take a straight edge across the first couple frets
and stack up your feeler gauges till it just touches the straight edge to find your fret height.
This picture is a little out of order and will come up again but what I recommend is, go around to your favorite playing guitars and measure the string height off the first fret. If you want, you can capo at the 12th fret and then again at the 5th fret if you play with very tall action / lots of relief. Stack the gauges again (if needed) till you just make contact with the string.
I set our guitars up with .016" off the first fret. This is plenty low but gives a fair amount of life in the nut (you can can take it down to .010 or less if you want but I find they will almost certainly buzz with changes in the neck, weather or frankly a dozen or so string changes). At the 12th fret I do .050-.055" height with .005" relief.
The key is here, to start putting numbers to actions you like instead of "this feels right" and "ohhh :holds fingers apart: bout this much". Once you can start writing down your favorite specs, it's easy to set up other guitars to match or be aware of how the weather is affecting your relief, setup ect.
Now that you have a number to work towards, simply add your desired height to your fret height and you are set. In my case, our frets usually end up right about .050" in height after level and crown and I like .o16 so I stack .016, .025, .026 (based on what I have in my set).
Now after marking your string spacing, file down till you just touch the feeler gauge. This will get you on the money almost every time. If you want, you can start conservative and check your work...
by stringing it up, and measure, verify or cut some more. Lets say you slotted everything till you touched the feeler gauge and when you measure you have .020 instead of .016". Just remove .004" from your gauge set and file some more.
Word of warning, verify capo'd around the 5th fret before you cut any deeper. If you have the bridge set very tall or relief set very large, you can get an artificially high reading at the first fret.
Work your way across and you're done! Then you can shape the top of the nut to your preference.
Super easy. Useful for not only new nuts but improving lower priced, poorer playing guitars. Most of the budget guitars really just need an extra 20 minutes attention at the nut to bring string height around, solve binding ect.
Hope this helps! I'll see what other things I can come up with for you guys.
edit: this is StewMac's new tool which is the same concept for 63 bucks: http://www.stewmac.com/shop/Tools/S...lot_Nut_Guard.html?actn=100101&xst=1&xsr=1811 Looks slick and I'm considering it just because I do this so often that I could probably justify the cost. It is a bit tricky to hang onto the feeler gauge set AND file but these files at a parts house are 5-10 bucks.